Wednesday, May 18, 2011

Guajillo Chile Black Bean Street Tacos

I've recently gotten back from a Caribbean cruise where I ate waaaaay too much "cruise food" and needed to detox. To me, this generally means cutting down the drinking a whole lot and only eating minimally processed fruits and veggies (no refined flour, no dairy, no eggs, no meat). Today marks the start of my third week eating what is essentially a vegan diet with some extra restrictions on processed food/complex carbohydrates. I've been eating well; don't cry for me, Argentina! 


Usually street tacos are tiny things full of mostly meat, with few toppings, (carne asada tossed with spicy sauce and topped with onion and cilantro and a lime to squeeze on top is pretty classic) but I wanted to create something that wasn't too gringo but still lightened things up for a busy weeknight. 
Served family style, with individual plates of mexican-style corn on the cob and chile lime fruit cups
Taco Filling Ingredients
2 tsp oil
1/4 diced onion
2 garlic cloves (pressed through a garlic press)
2 Tbsp Guajillo chile paste
1 Tbsp chili powder
1 15 oz. can of no salt added black beans, undrained, unrinsed


Toppings
1 finely diced small tomato
1/2 avocado, sliced 1/8th inch thick
1 large serrano chile sliced into long thin strips
2 Tbsp cilantro, rough chopped
1 green onion, thin bias sliced


12 4” Corn Tortillas (tiny street taco size)


Prepare Filling
Heat oil in a medium saucepan over medium heat. Add onion, then garlic and saute until translucent, about 3 minutes. 
Add chile paste and chile powder and stir to combine and heat through. Stir in the whole can of beans (including liquid), and bring to a high simmer, stirring frequently. 
Reduce heat and let liquid reduce while you prepare the rest of your meal or prepare toppings. Beans should not be too soupy- you want them to stay put in your tacos.


Assemble
Heat 4 tortillas at a time directly over the fire if you have a gas stove flipping frequently (no pan, put the tortillas where you’d put a pan). If you don’t have a gas stove, you can wrap small stacks of tortillas in a damp paper towel and nuke for 20 seconds until warmed. Don’t skip the tortilla heating or your tortillas may tear.


Hold the warmed tortilla in one hand, add a heaping tablespoon of beans, 1 slice of avocado, 1 slice of serrano chile, a sprinkle of tomatoes, and a pinch of cilantro and green onion.


Make a meal
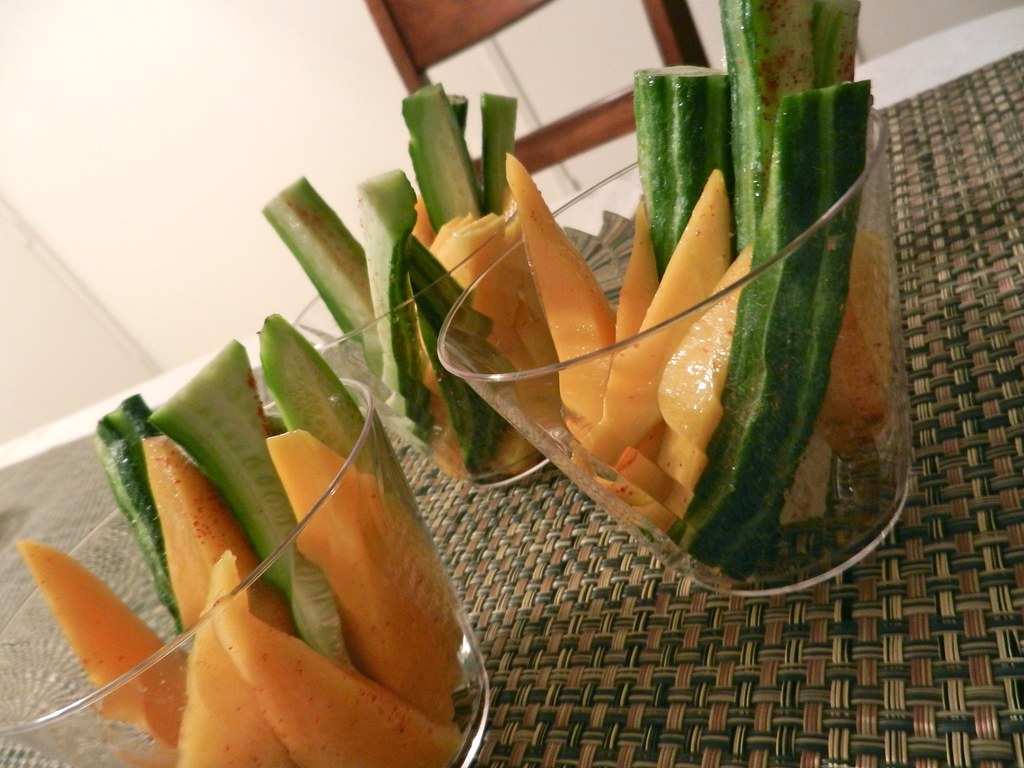
Mango & Cucumber Spears with Lime, Chile & Sea Salt
Elotes (Mexican-Style Corn on the Cob)

Mango & Cucumber Spears with Lime, Chile & Sea Salt

Spicy, sweet, crunchy, tangy, AND salty!
Refreshing fruit salads like this are often available at farmer’s markets here and from street vendors in Mexico. They often are served sticking out of red solo party cups and can include watermelon, jicama, pineapple, melon, and papaya too!

Ingredients
1 cucumber, seeds and skin removed
1 large mango, seed and skin removed
1 lime
cayenne pepper to taste
sea salt to taste


Procedure
Slice cucumber and mango into spears and lay out to receive seasoning evenly. Sprinkle with lime juice, then add cayenne, then salt.
Tip: Add salt and spices from high above the food to distribute it better.
Gather up your spears and serve sticking up in a cup like a bouquet of flowers.

Elotes (Mexican-Style Corn on the Cob)

Mexican street vendors sell corn boiled in their husks from carts stocked with toppings that you can dress your corn up with (kind of like a hot dog cart!). They're also available at most of the Farmer's Markets in San Diego, and indeed, I got my ears of corn from the Little Italy Mercato this week to dress up at home.
Generally the husk is just peeled back so you can use it as a handle to eat the corn, but unless I'm serving it in the backyard, I usually just remove it entirely. This recipe includes my favorite toppings and is vegan if you use the fakey mayo (I can't tell the difference in this recipe between the Vegenaise and commercial mayo, so why not?).


Ingredients
2 Ears of corn, still in the husk
Mayonnaise (I used Follow Your Heart Vegenaise)
Lime
Tapatio or Cholula hot sauce
1 tsp rough chopped cilantro


Procedure
Microwave corn on high for 5 minutes (you will need to increase time for more than 2 ears of corn) and allow to cool for 5 minutes. Shuck the corn (Corn will still be very hot, so you may want to let it cool a little more if you are burning yourself)
Rub all over with lime halves, thinly spread on mayo, sprinkle with or roll in cilantro, and drizzle on hot sauce.
This is often served topped with Kraft parmesan that comes in the green cardboard can, but to veganize, you can sprinkle some nutritional yeast on. I just didn’t bother, it was delicious enough already.

Friday, February 25, 2011

Chile Vodka Cappellini al Gamberi

Peeled shrimp ready to de-vein 
After making some delicious smokey chile pastes, I wanted to cook something right away that prominently featured my new ingredient!

I love tomato vodka cream sauce for it's bite and wondered if cutting back on the tomato and adding in plenty of smokey chile paste would work. I had some bacon that Josh and I made a couple weeks ago that would be a delicious addition to the sauce, and I also had some frozen shrimp that could definitely perch atop a pile of delicious pasta, so I set to work creating this recipe.

It wasn't difficult (great week night food) and the smokiness of the chiles really complimented the bite from the vodka in the sauce.
Mise En Place
Chile Vodka Cappellini al Gamberi
angel hair pasta with shrimp


Ingredients
1/4 lb. Bacon
small yellow onion, diced
4 Garlic cloves minced/pressed through a garlic press
28 oz can of whole tomatoes
1/2 c. Pasilla chile paste (Ancho would work too)
1/2 c. cream
1/2 c. vodka
1 Tbsp olive oil
raw shrimp, peeled and deveined
1 lb. angel hair pasta
Salt
Pepper
Basil chiffonade for garnish


Oh, bacon lardons! Delicious house-cured pork bellies! 

Rendering the bacon fat to saute the veggies in
Set a large pot of salted water on to boil for the pasta.

Cut the bacon into 1/2" rectangular pieces (lardons) and add to a cold saute pan. Turn on the heat to medium, and allow the fat to melt, being careful not to burn the lardons.

Add the diced onion and saute until translucent, about 3-5 minutes. Add the garlic and stir to combine. Add the whole tomatoes, squishing them in your hands as you remove them to the can/add them to the pan, then dump in the juice from the can. Add the chile paste and increase heat to high and bring the sauce to a boil, stirring frequently.

Sauce ready to go in the blender
Turn off the heat and add the sauce to the blender, buzzing until smooth. Return the sauce to the pan over low heat and add the cream and vodka. Stir to combine and set aside while you prepare the pasta and shrimp.

Heat grill or grill pan to medium heat.

Add pasta to boiling water.

Toss the shrimp with olive oil, salt and pepper. Add the shrimp, let cook for 2 or 3 minutes, until tails turn pink and meat starts to lose it's translucency. Flip each shrimp and cook another minute. Remove pan from heat.

Tails turning pink and meat just beginning to become opaque. Time to flip! Elapsed time on the pan: 2 minutes.
 Drain pasta when done (just about 6 minutes) and add to the sauce, tossing to combine.  Taste for seasoning, plate pasta, add shrimp, garnish & serve!
Chile Vodka Cappellini al Gamberi

Thursday, February 24, 2011

Adventures in Arthropods

Lobsters. I’ve never been brave enough to cook live lobster at home- I was afraid of them screaming. I was afraid of them being expensive to ruin in my experimentation. I was afraid of them being a production. I am allergic to them. They are probably my favorite food next to avocados, so it is an allergy I ignore, they just screw with my sinuses for a couple days, it’s worth it. A boyfriend once got me a book called Lobster at Home, to try to help me over my fear and it just made it worse, so the book has been carted with the rest of my cookbook collection from house to house and I’ve never made a single recipe in it.

Mr. Crankypants out of the tank
I’m lucky to live near many ethnic markets and in particular, a great Vietnamese supermarket called World Foods and so I can overcome the expensive issue. The live lobsters at this place are fresh and feisty and are $9.99 a pound this time of year. Not terrible for such a delicacy. The stars aligned and the big pot I use to brew in was already out from brewing last weekend, so I figured, what the hell, I’ll buy a couple lobsters and we’ll conquer this thing once and for all.


They ended up being enormous though, so when I got home, called a couple of friends over to help eat them/beat them into submission. Also the dog thought the lobster was awesome. After some sniffing and poking with her nose, she tentatively bit the lobster’s head and looked up at me for further instruction. I put the lobster back in the sink with his buddy instead. Ain’t no dog of mine eating a $30 lobster.

All 4 of us were involved in the epic adventure that was cooking lobster, and it did wind up being quite a messy and absurd production, but overall, it was relatively easy and we wound up with a delicious dinner.
Mr. Crankypants visits the sink

Things I learned:

  • 6 lbs of lobster takes about 20 minutes to cook in boiling water. 
  • Leave the rubber bands on the claws until they come out of the pot. 
  • Put the lobsters in head first to kill them quickly. 
  • They don’t scream, whistle or otherwise put up a fuss. 

I worked myself into quite the tizzy before putting them in but that part was pretty uneventful- you just pick them up by the body piece, behind their big claws and drop them in.

Not so tough now, are you?
There’s a zillion ways to deconstruct the things after they come out, but we didn’t do anything terribly fancy. I clipped the rubber bands off and then, per Lobster at Home, stuck a knife in the thing’s head between the eyes and held it by the tail over the sink to drain the excess water out to make the rest of the process less watery/messy. We tore the tail off the body (wow are there some crazy things in there- one was a female, full of roe), then tore the tail flipper fan part off. This gave us the ability to jam in the handle of a spoon into that opening and push out the tail meat through the bigger hole where the tail used to be connected to the body. So we had one huge chunk of meat, YAY! It gets deveined at that point, just like a shrimp (I had no idea why this surprised me, but it did). Then we tore the big claws off and I had the guys whack at them with the back of the cleaver. Holy crap was that shell big and hard. Lobster bits got everywhere during this part of the procedure and it was a fair bit of work to get in there and get to the meat. Then we got the meat out of the big knuckles/legs that those claws were attached to. We snapped off all the other legs and started to roll them with a rolling pin to get the meat out, but that turned out to be a pain in the ass so we gave up (I kinda wish I’d come back to do it later...next time) because we had a whole other lobster to dismantle. It wound up being plenty of food and provided plenty of leftovers, which you’ll see below turned into one of the best leftover nights in the history of man.

That night, however, I served the lobster simply with butter that I clarified in the microwave (nuke until melted and starting to foam, fish out the foam and white solids with a spoon so all that’s left is clear yellow butter), baked russet potatoes with sour cream, and tender young asparagus steamed in the microwave.

So this is what we did with the leftovers on Monday night (after a whole day of work, I might add)...

Lobster Ravioli with Champagne Cream Sauce 
Make the filling first.

Filling Ingredients
2 Tbsp butter
1 Tbsp olive oil
2 Tbsp. finely minced shallots
1 big garlic clove, minced/pressed through a garlic press
~8 oz. lobster meat
zest from 1 lemon
2 Tbsp. finely minced fennel (fronds and/or stalks)
1/4 c. ricotta cheese
sea salt
white pepper

Filling Procedure
Pick through the lobster meat and pull out the nicest, reddest chunks to use for garnish and set them aside.
Pretty claw and leg meat set aside for garnish

Then chop the rest of the meat very finely, chunks are the enemy of ravioli filling, so you're going for something like coarse sausage consistency.
Mincing the remaining lobster meat
Lemon zest, garlic, minced shallot & chopped fennel fronds

Heat a saute pan big enough to hold all of your ravioli over medium heat. Add butter and olive oil until melted. Add shallots and cook for 2 minutes. Mix in garlic, then add lobster, lemon zest, and fennel.
Cook until heated through and add ricotta cheese, mixing until evenly distributed.
Ricotta added & ready to be stirred in

Taste and adjust seasoning with salt and pepper. Take off the heat and allow to cool.
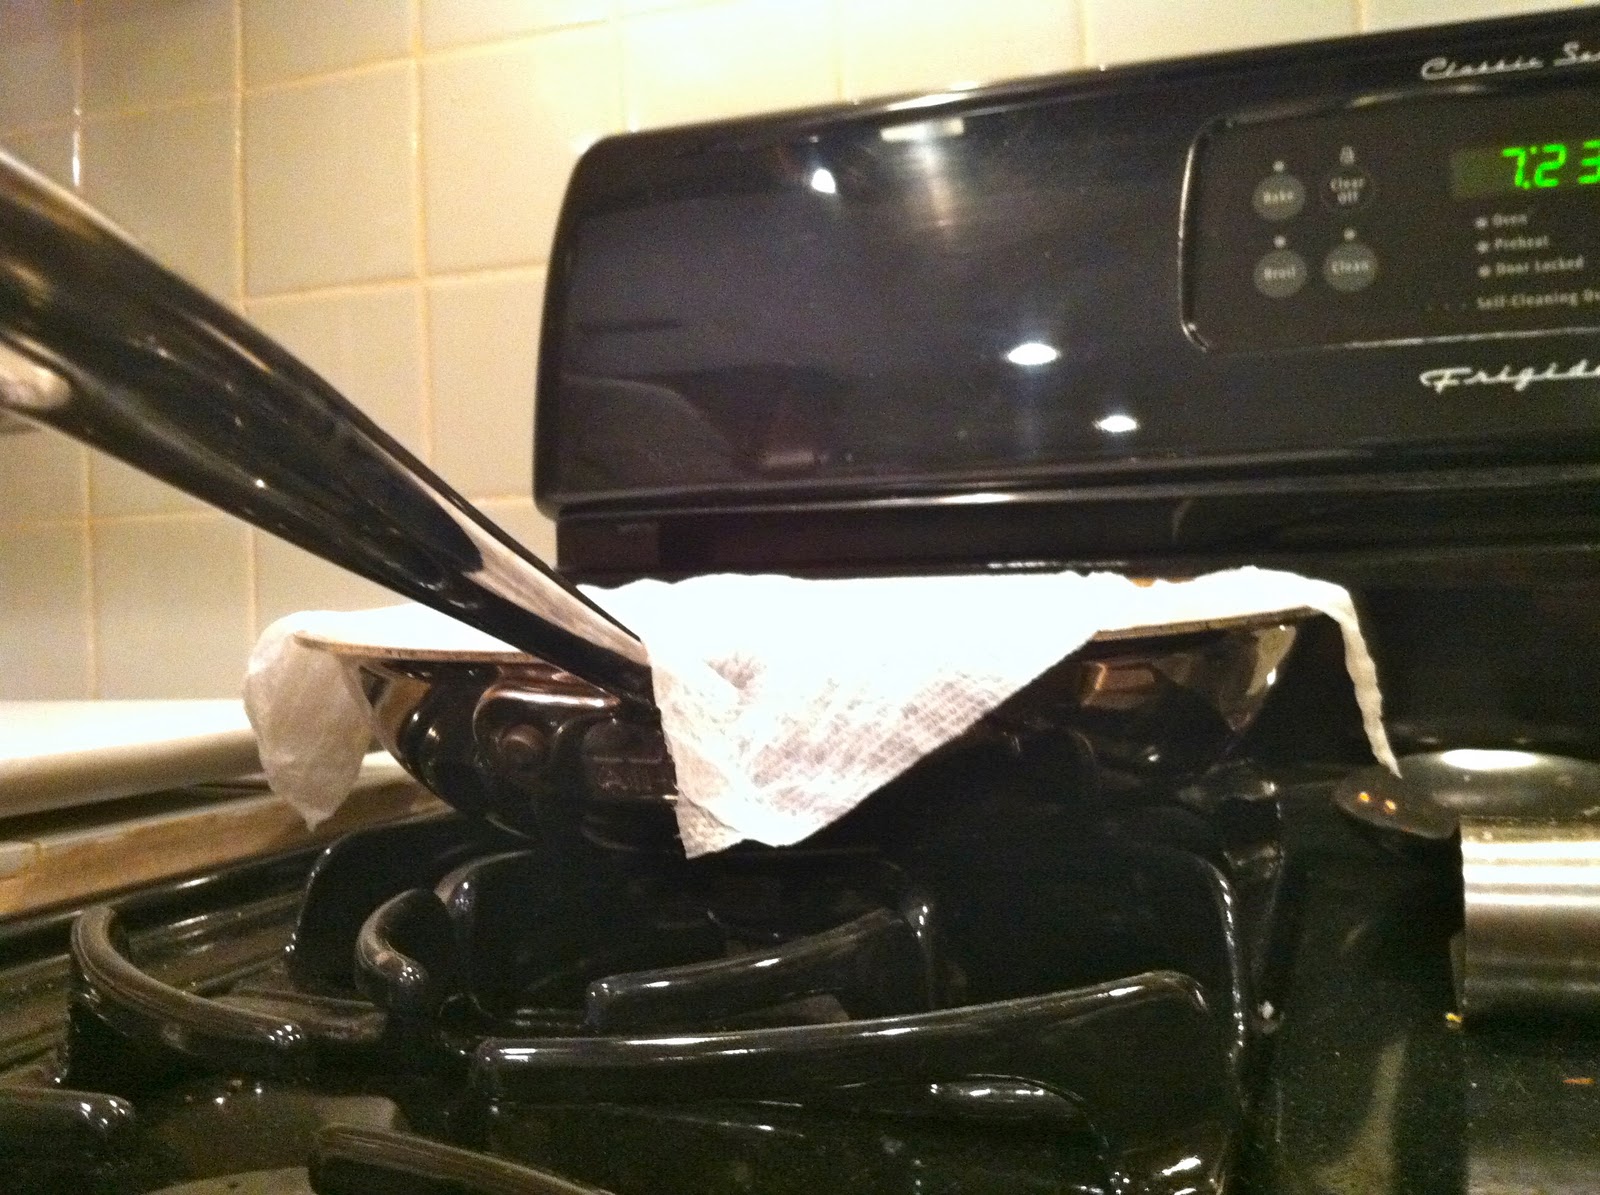
A damp paper towel draped over the filling keeps it from getting crusty while it sits


Next, make the pasta dough and assemble ravioli, but before you start, set a BIG pot of water on to boil and add a bunch of sea salt so it tastes oceany. 

Pasta Dough Ingredients
2 c. all purpose flour
1 tsp. salt
3 eggs
1 egg + 1 Tbsp. water mixed together to form an egg wash
Pasta Procedure

Directions if you’re using a stand mixer 
Put eggs, salt & flour in the bowl of your stand mixer in that order. Mix with paddle attachment on low until combined, increase speed to medium until the dough comes together and looks smooth and uniform throughout. It should not be dry nor sticky.

Directions by hand
Pile flour on a smooth board or countertop and create an indentation, or well, in the top of the mound. Crack the eggs into the well and sprinkle salt on top. Using a fork, beat the eggs, breaking up the yolks into the whites, while trying not to disturb the flour walls of the well.
Scrambling the egg without disturbing the flour

Gradually start incorporating the flour into the eggs by increasing the boundary of the well with your fork as you beat- the circle where you’re beating with the fork becoming bigger and bigger across. Try not to dig the well too deep though, you want to keep everything contained in the well as it gets thicker and thicker.
Progress incorporating flour into the egg, notice how the well got wider and shallower

Eventually (it doesn’t take long) you’ll have incorporated most of the flour and have something more doughy than liquid in the center of your well. This is when I switch to using my hands and knead in the rest of the flour. The dough should be smooth and not dry or sticky.


Rolling the dough into sheets:
Next your pasta dough will go through the final kneading in the pasta machine. Form the dough into an oblong rectangle an inch or two narrower than your pasta machine. Pass the dough through the widest setting on your machine, fold it back on itself and pass it through again. My dough was a little too wet and was coming out all raggedy still after 6 passes, so I dusted both sides lightly with flour, passed it through again and it came out beautifully.

When it looks like a sheet of pasta, start cranking down the opening, one level at a time, until it gets too long to handle, and cut it into pieces. The pieces you’re not working with can be stored under a damp paper towel until you need them. Ravioli needs to be as thin as possible so that when it doubles over onto itself at the seams, it’s not too doughy- on my machine that means level 6.

Assembling the ravioli:
Once your dough is all rolled out, cut it into manageable sheets and lay them out on a floured board (otherwise your ravioli will stick). Mound teaspoons of filling down one side of the dough rectangle, about an inch apart, being careful not to use too much- it’s tempting to overfill.


Brush a little egg wash between each mound and down the long side of the sheet of pasta- remember egg wash doesn’t stick well to egg wash, it sticks to the pasta, so be aware of where you’re brushing that stuff. Fold over the other half of the pasta sheet and gently press the dough together between the filling, trying not to trap any air in there (it can cause the ravioli to burst when you boil them). Use a sharp knife or a fancy pants ravioli cutter to trim the edges and cut into individual ravioli. Repeat until you’re out of filling or pasta or decide you have enough and are over it.
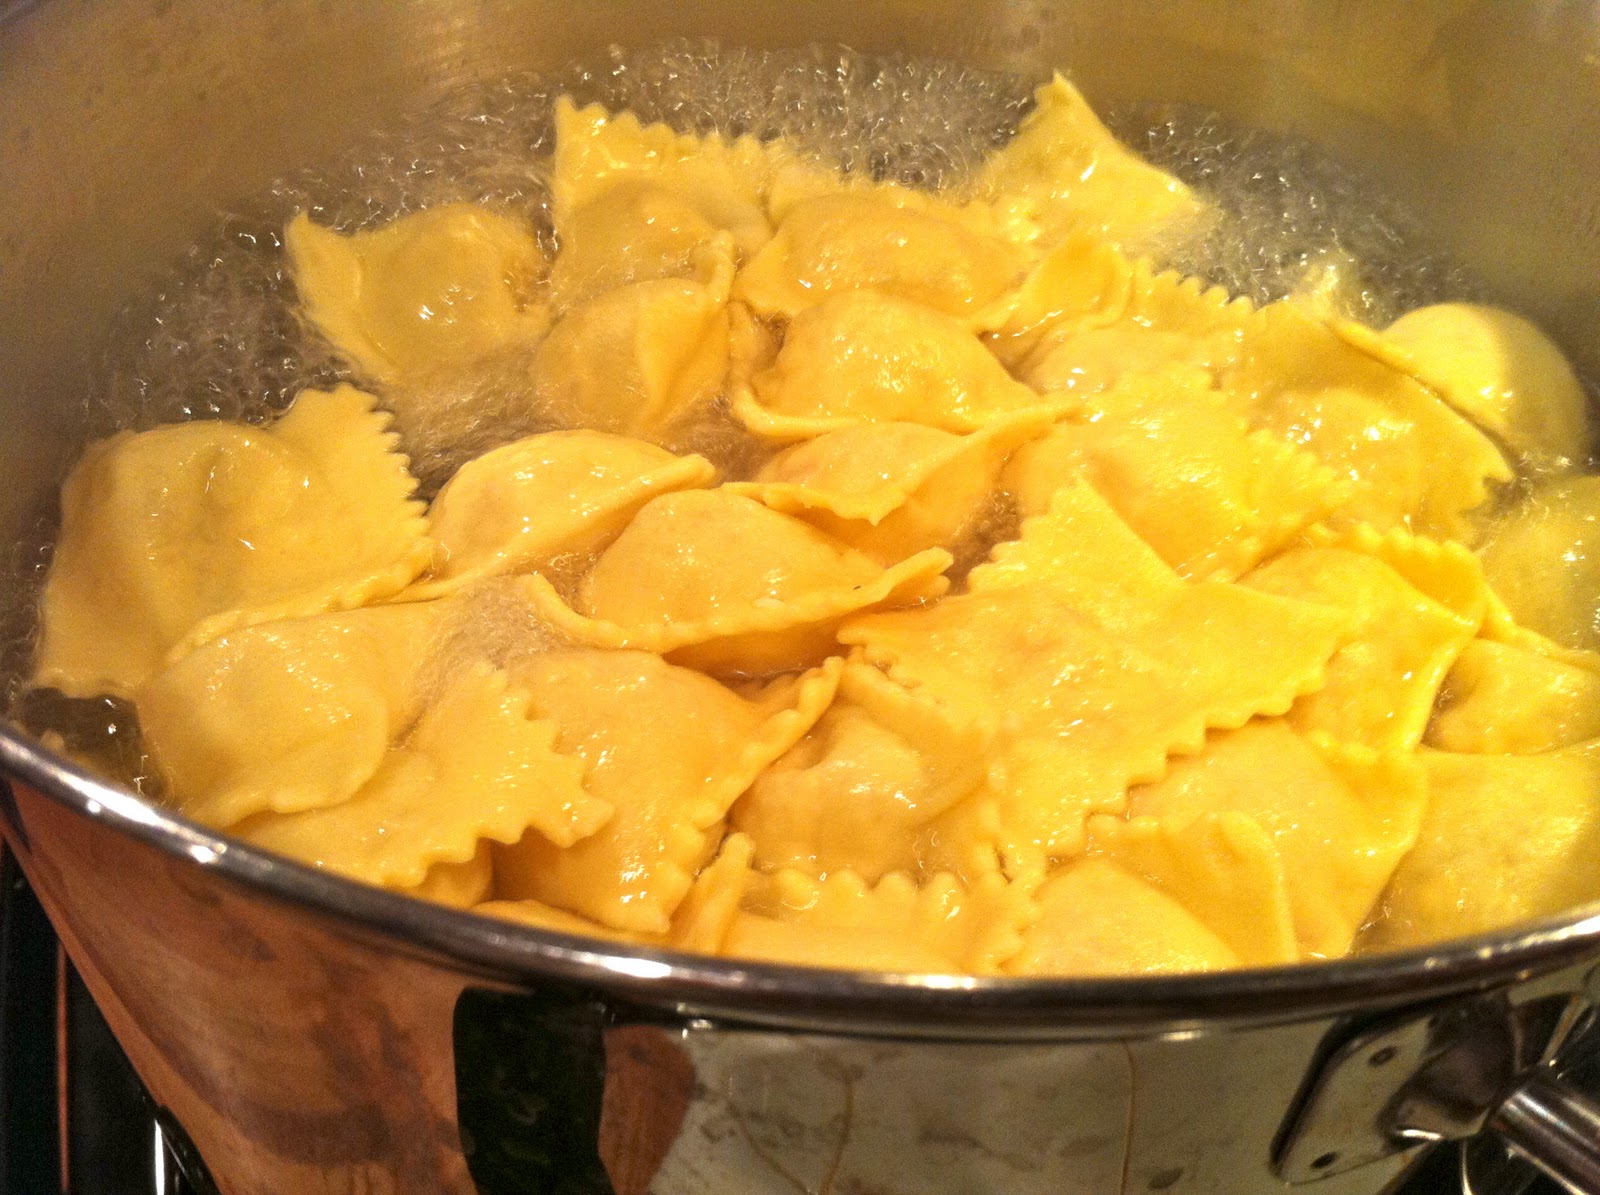
Ravioli waiting to go in the jacuzzi


Next make the sauce. 

Sauce Ingredients
6 Tbsp. butter
1 Tbsp. finely minced shallots
4 Tbsp. flour
3/4 c. champagne
juice from 1 lemon
3/4 c. cream
salt
white pepper

Sauce Procedure

Melt butter over medium heat, add shallots and cook for a minute. Add flour and cook 3 or 4 minutes until the raw flour taste has been mostly cooked out. Add the champagne and lemon juice, raise the heat to medium-high, and cook another couple of minutes. Stir in the cream, bring up to almost a boil and taste for seasonings. Add salt and pepper if needed and reduce heat to low.
The finished champagne cream sauce, being kept warm on the stove


Finish the dish.

Lifting the lid for a couple seconds will deflate any ravioli threatening to pop as they cook

Add the ravioli to rapidly boiling water and cover. Cook for 3 minutes. Fish out the ravioli with a spider or slotted spoon and add to the pan of sauce.

Out of the water, into the sauce

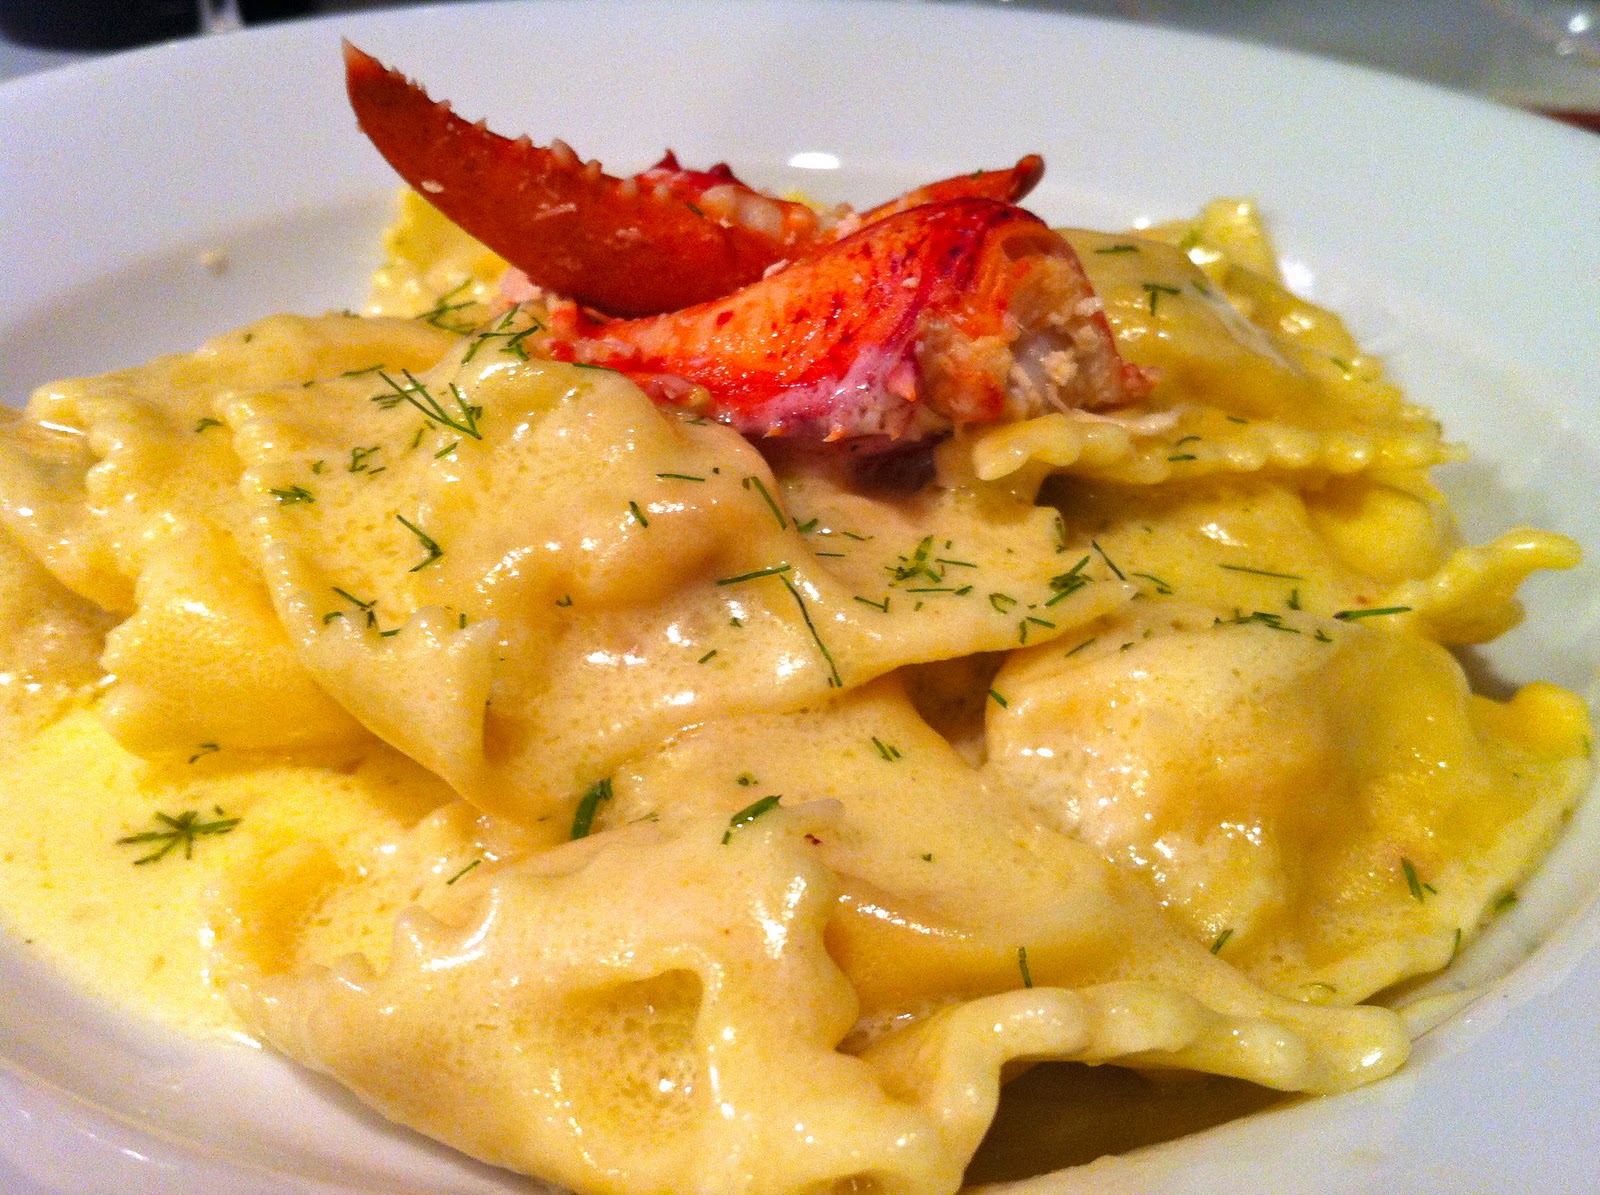
Toss to coat and serve in a warmed bowl, garnished with red lobster chunks and chopped fennel fronds.
Lobster Ravioli with Champagne Cream Sauce

Wednesday, February 23, 2011

Yogurt at Home

Yogurt is one of those things that I hate buying now that I know how easy it is to make at home. Yogurt is just milk that's been lived in by bacteria, so all you need to do is make the milk very habitable for the right bacteria, introduce the right bacteria, and let them reproduce. They do all the work, just give them a happy home!

Yogurt cheese made with this contraption
I usually do a gallon at a time, so that I've got plenty to use plain, pack into little containers with fruit jam to take to work with me, and also strain to make yogurt cheese (a great substitute for sour cream and cream cheese that is an awesome base for dips), but there's no reason you need to make that much- quantities mean very little in this "recipe."

One thing to be careful of is that you want anything that's going to come in contact with your milk/yogurt to be clean so that you're growing the bacteria you want, not some nasty bacteria that came riding in on the wind. Collecting a spoon, 1 cup dry measuring cup, glass bowl, and your thermometer and pouring boiling water over them into a bigger bowl does the trick for me.

Turn on your oven to it's lowest temp setting (mine goes as low as 180) and let it preheat.

First, pour your milk (I use whole milk because it's delicious) into a big pot and heat slowly to 180 degrees,  not letting the bottom scorch by stirring every once in a while.

A binder clip helps hold the thermometer away from the pot, leftover homemade yogurt ready to populate the new milk


Then let the milk cool to 120 degrees (you can speed this up with an ice bath, but I just go do something else for a while).

Take a small container of leftover homemade yogurt or store bought yogurt with LIVE ACTIVE CULTURES <-- those are the bacteria you need so they won't help you if they're dead, and pour into your clean glass bowl. Use the clean 1 cup dry measuring cup as a ladle to dip into your 120 degree milk and ladle onto the store bought yogurt in the bowl. Mix that together so they blend into a smoothie consistency and then pour it into the big pot of milk.

At this point, you can pop a lid on your big pot of inoculated warm milk, turn off your warm oven and pop the whole thing in for 6 hours or more, but you can also portion it out at this point....you'll see what I mean below.

The idea is to give the bacteria a warm place to multiply and do their work- hence the warm oven. Just be sure you don't leave the oven on, that would be too hot. So turn it off, and put the covered, soon-to-be-yogurt in until it's tart enough for you. After 6 hours it should be solidified like yogurt, but will be very mild in flavor, with almost no tartness at all. If you leave it overnight for 8 or 9 hours, it will be more tart, like commercial yogurt.

Recently I bought some glass jelly jars with the intention of making fruit on the bottom yogurt to take into work for lunch and that wound up being a little extra work, but very delicious and pretty!
I made the strawberry jam recipe that came with the package of pectin, using frozen strawberries and adding a pinch of salt, a splash of balsamic vinegar, and a few grinds of white pepper to zing it up a bit.

Once the jam was done, I poured a little into the bottoms of the clean jars and popped them in the fridge to firm up for a few minutes, but took them out so they could warm back up to room temperature while I made the yogurt (I didn't want cold glass jars sucking all the heat out of my warm milk mixture when I poured it in).
Jam firming up in the fridge so the second layer wouldn't disturb the pretty layer too much

Once the milk was mixed with the commercial yogurt and ready to firm up, instead of leaving it all in the big pot, I poured it gently, using a funnel, over the now firmer jelly  in the jars. Then I screwed on the lids loosely and popped them into the warmed oven to sit overnight and turn into fruit on the bottom yogurt. I can't wait to do other flavors next time!
Strawberry Balsamic Fruit on the Bottom Yogurt

Tuesday, February 22, 2011

Bay Park Fish Co.

Luna Oysters from North SD County
One of my favorite places to eat lunch in San Diego is Bay Park Fish Co., conveniently located next to Seisel's in Bay Park. The Fish Co. serves dinner too, but I enjoy sitting out on the (dog friendly) patio in the sunshine. Supporting local fishermen is what this place is all about but they supplement with fish from elsewhere to keep the menu consistent. Sunday turned out to be gorgeous after an unusual San Diego storm and Fish Co.'s patio was where we could be found for beers and beautiful fresh food.

We started with a half dozen local oysters from Carlsbad AquaFarm that were spectacular. Small and reminiscent of Kumamotos, these were Luna oysters and had the most pure, clean flavor that I have ever had. They serve them with lime and lemon wedges, cocktail sauce, and prepared horseradish, but I didn't put anything on the first few just to taste them properly. I admit I squeezed a little lime and dripped a drop of Tapatio (the condiment caddies on the tables are well stocked with Tabasco too) on a couple others, just to mix it up. Lance had ordered clam chowder (New England style) that I was ignoring, so was lucky to get one of my precious oysters; and while intended to share one with my spoiled dog, she merely got to gnaw a shell. I should have gotten another 6. Damn.

Lance had perfectly grilled Mahi tacos, (panko crusted and fried is another option, and they also let you choose between flour and corn tortillas). They're served 2 to an order, with very tasty rice and beans, house made hot sauce that I love on the side, a big roasted jalapeno, lime wedges, and all the fixin's (pico de gallo, cabbage & crema) inside. Avocado and cheese can be added optionally. The generous portion of fish in each taco was juicy and not over-seasoned. The taco plate is $10.
Grilled Mahi Taco
 Even though I came here with the intention of eating a few oysters, having a beer and a taco or two, I am a sucker for the smoked fish plate. It's on the menu as a starter, but it's a sizable lunch for me. Think smoked tuna salad- they add corn, which really add nice sweetness and crunch, and don't add too much mayo. It's served on Romaine with tasty corn chips to scoop the smoked fish onto, and I ask for extra romaine to try to tone down my chip consumption. Didn't work, I ate all the lettuce AND all the chips. I also dig that they serve the smoked fish with a big pile of perfect plain avocado sliced on top. The smoked fish plate is $9.
Smoked Fish Plate
They have a few taps that are either local or Mexican, and we had Pacifico with our starters (a refreshing beer that paired nicely with the oysters without overpowering) and Calico, a local amber ale from Ballast Point, with our mains. Perfect perfect perfect.


Fish and Shellfish for sale at the counter
Bay Park Fish Co. also has a fresh fish counter and a leetle tiny sushi bar inside. I often pick up tortillas at Siesel's next door and fresh Mahi from the counter at Fish Co. to grill up my own tacos at home and I'm never disappointed in the quality of their fish. The selection isn't huge, and it ain't cheap, but I'll trade that for great quality any day.

The Fish Co. is the perfect casual place to take out of town guests who want to experience San Diego's fresh mexican inspired local cuisine, but it's definitely not a tourist spot. Flip-flops are practically required.