Monday, October 8, 2018

How to Do Mickey's Halloween Party If Rides Are Your First Priority


General Info

Be sure to install the Disneyland App before you head to the park.

Matterhorn & Tiki Room are closed for refurbishment.

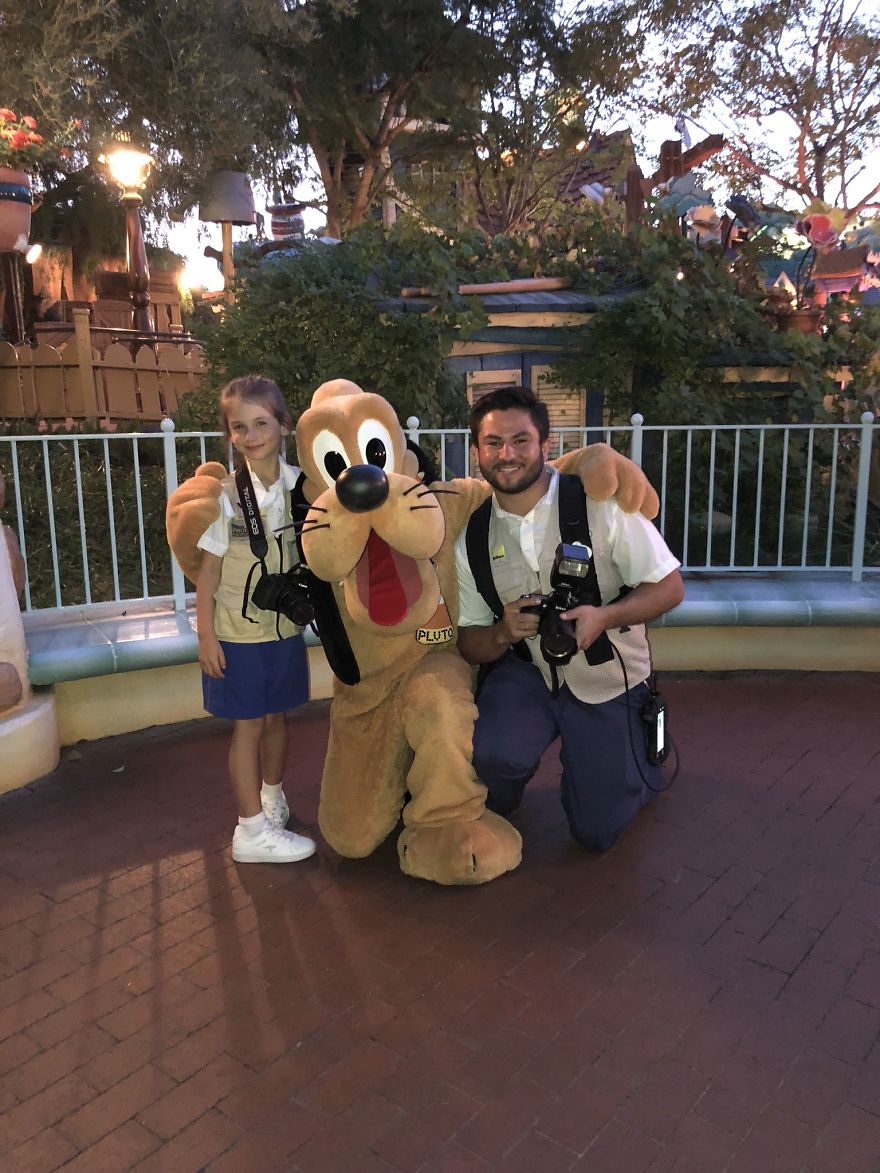
Spot a photopass photographer by their uniform
Your Halloween Party ticket entitles you to photopass photographs. If you see a photopass photographer walking or standing with no line, ask if they are available to take pictures. Ask them where they’d recommend and be super awesome to them and they will take amazing pictures of your family with their great cameras and the pics will be available to download in the app usually within an hour. 

Between 4 & 6pm, while the crowd is still mixed, lines will be long for everything good/fast/big. So during this time, you’ll either only be able to get on one or 2 big rides OR you can hop on smaller attractions in Fantasyland: Pinnochio’s Daring Journey, Scary Adventures of Snow White, Mr. Toad’s Wild Ride, Dumbo the Flying Elephant, King Arthur’s Carrousel, Casey Jr. Circus Train, Alice in Wonderland, Mad Tea Party, Storybook Land Canal boats. 
Just open your app, zoom into Fantasyland and pick by shortest lines.

Toontown closes early because of fireworks so if this is a priority, do it before the party, between 4&6, instead of Fantasyland. In toontown you’ll find extremely long lines for character meet & greets, a bunch of playhouses to run around in, and 2 rides: Roger Rabbit’s Car Toon Spin (which I think is overrated for the length of the line) and Gadget’s Go Coaster, which is a very short ride but cute and only worth it if the line is less than 15 minutes.


Rides During The Party

The longest line will be for Haunted Mansion, second longest will be Space Mountain: Ghost Galaxy or Peter Pan. 

Plan to do Haunted mansion at 8:45/9 pm, during the first parade. Once done, you can take the Disneyland Railroad from New Orleans Square to Tomorrowland (to avoid cutting across the parade/huge traffic jam) and then ride Space Mountain. OR reverse this if you’re closer to Tomorrowland just before the parade. 

To do the rides in the park most effectively, try to tackle all the things in one section of the park that you’ll want to do that day before moving on to the next area. If something is closed, it’s likely temporary, so just move on to the next closest ride you want to do and check back when you’re done with that ride. Especially avoid crossing the hub (the center of the park, near the castle) more than necessary on party nights, this is where traffic builds up from parades and shows on party nights.

So this means if you start in Fantasyland before the party, then hook around behind to ride Big Thunder at 6, then keep going to Indiana Jones, Jungle Cruise, Pirates, Splash Mountain & Winnie the Pooh, you’ll be near Haunted Mansion right around 8:45 if you got some candy along the way and stopped for dinner at Zocalo or Bengal BBQ (outlined below).

Then you can do the Tomorrowland side of the park, where you’ll find Space Mountain Ghost Galaxy, Star Tours, (if they’re into star wars, I also recommend checking out Star Wars Launch Bay, even though it’s not a ride, for some good meet and greets and neat star wars stuff to look at) Autopia, Buzz Lightyear’s Astro Blasters, Astro Orbiter, Finding Nemo’s Submarines

Candy

Lines for the treat trails are long at first, so don’t bother until after 7pm. Then just jump in line for the treat trails that look less busy. They give out apples and carrots and stuff too so the adults won’t starve. BE OPPORTUNISTIC here. There are treat trails all over, if you see one and it doesn’t look busy, by all means grab candy as you pass.

Food

Sitting down at a restaurant will likely take too big of a chunk out of your party time 4pm-11pm goes by VERY quickly! So stick to the quick service counter style restaurants for best food with minimum time commitments.

I recommend getting dinner from Bengal BBQ and getting an assortment of skewers and if you go here, try the Jungle Julep. It’s my favorite little slushy drink. Could do with some rum, but hey! 

Quick service restaurants I recommend:

Rancho Del Zocalo: Mexican, better than you’d think
Red Rose Taverne: Has some unusual options 
Hungry Bear Restaurant: If you’re looking for a burger/nuggets/mac n cheese
Bengal BBQ: Don’t miss the Jungle Julep or pork belly skewer!


I do NOT recommend Galactic Grill or Pizza Planet, they have the most unimpressive food in the park and some of it is downright bad.

Here is the Halloween Foodie guide (these things are only available until halloween)
It looks like all candy at first, keep scrolling, there’s real food, I promise. Also pay attention to where it turns into food in Disney California Adventure (DCA), the Halloween party only gets you admission into Disneyland.


Everything Else

The parade is only worth seeing if you get there an hour in advance to sit on the curb along the parade route. It's great, but don't bother from a distance. The fireworks are great, but it's tough to get a good spot where you can hear the music, see the projections on the castle/buildings of main street, so I recommend if you want to see them, catch them at Small World, where the crowd is thinner and the view is still good and there are speakers to hear the music. The Disneyland Railroad is closed for fireworks, so you'll have to hoof it, and it's pretty out of the way. Skip these if they're not as important to you as rides.

There are some excellent shows and character meet and greets that are exclusive to the party. I love seeing the Dapper Dans reanimated as the Cadaver Dans, and bumping into villains, but for this stuff I just recommend rolling with it, not planning it out. So if you see something cool, like the Dans singing on the Rivers of America, stop for a couple minutes to have a listen, then continue on. Disneyland is so much more enjoyable when you stop for the little, unexpected things like this. 

Saturday, July 1, 2017

Tomato Jam

The first ripe Indigo Rose tomato of the season
I see it's been 5 years since I've published a recipe. Let's get on with it.

Barrett and I grew Indigo Rose tomatoes in our 4' x 8' box at our community garden, Smarts Farm. As is so typical with beautiful things, they don't taste amazing. (jewelry, art, sunsets: do not eat) They're not awful or anything, I mean, they're garden fresh tomatoes, how bad can they be? But these won't win any taste competitions compared to many others you may grow in your garden.

So why the hell did we grow them? They're gorgeous.

They're prolific too, check out the background of that picture, all those shiny indigo things? We harvested about 3 pounds and after eating a pound of them as snacks, I decided to attempt to crank up their bland tomato flavor into something tomatoier and settled on jam.

Dude, this is going to revolutionize cheese and crackers for the month of July. It is holy shit good.

So if you find yourself in possession of tomatoes that need to get their shit together, I recommend this Tomato Jam.
Diced Indigo Rose, they're red inside

Ingredients


  • 2 lbs tomatoes, diced
  • 1 c granulated sugar
  • 2 Tbsp fresh squeezed lime juice
  • 1 Tbsp grated or minced ginger
  • 1 tsp ground cumin
  • 1 tsp salt
  • 1/4 tsp cinnamon
  • 1/8 tsp clove

Procedure

Dump all ingredients in heavy bottom saucepan or dutch oven, bring to a boil over medium high while stirring occasionally. 

Reduce heat to a simmer and cook, continuing to stir occasionally for 2 hours.


Friday, April 6, 2012

Sushi Class

Its been a while since I've posted, I've been busy as hell.
I did teach a sushi class though, well, technically 3 of them, and wanted to post those recipes. It was more hands on than my normal classes, that usually only have one hands-on element. Students all made their own sushi this time, I made and served just the hot food and dessert.
Here's the pdf of all the recipes, except for the daifuku, which is below.
Back row: Toro (tuna), Ebi (shrimp), Sake (salmon) and Avocado nigiri sushi, Inarizushi, Spicy California Gunkan Maki
Front Row: Tai (snapper), Hamachi (yellowtail) with Yuzu Ponzu, serrano chile and cilantro, Sake Rose (salmon) Sashimi
For hot food we made blistered shishito peppers with smoked sea salt, garlic chile edamame, and my quick and dirty miso soup.

Pink Daifuku
For dessert, even though I knew I didn't have time to cover how to make them, I served homemade daifuku, a kind of mochi (sweet) that is a little unusual and class presented an excellent opportunity for me to give the students something to taste that they wouldn't normally seek out on their own. Not only is the flavor of daifuku odd for American palettes, but the texture is like nothing in our cuisine either. The best description I overheard one student give another was, "It's like gummy raw pie dough wrapped around refried beans with sugar in them." Yes, I suppose that's pretty accurate.

Daifuku Recipe

Filling Ingredients (makes enough for 2 daifuku recipes)

1 can Adzuki beans 14 oz
1/2 c water
1 c granulated sugar
1 Tbsp vegetable oil
Pinch of salt

Dough Ingredients

1 c Mochiko (white box with a blue star on it, Koda Farms brand of Sweet Rice Flour)
1/4 c granulated sugar
2/3 c water
Potato starch, for flouring the board (cornstarch works too)

Filling Procedure
Bring water and sugar to a boil and boil until sugar is dissolved and set aside to cool.
Drain and rinse the adzuki beans, and add to a saucepan over medium heat. Add oil, salt and 1/3 c of the sugar water syrup and mash the beans up with a potato masher. They should be the consistency of thick refried beans (add more sugar syrup if you need to). Heat until bean paste is hot and starts to look a little shiny. Set aside to cool.

Daifuku Procedure
Mix the dough ingredients in a microwave safe bowl (if you'd like to color them, mix in 1 or 2 drops of food coloring to the water before adding it to the rest of the ingredients- green and pink are traditional colors) making sure there are no lumps and there's no dough/residue stuck to the walls of the bowl, and cover with plastic wrap. Microwave on high for 2 minutes. Take it out and mix thoroughly. Cover it again and microwave for 1 minute more. If when you open the door, the dough deflates, it's ready. If your dough didn't inflate in the microwave yet, zap it again for another minute. It should deflate when you open the door.

Remove the dough from the microwave and scrape out onto a potato starch covered board. Pat the hot dough to flatten a bit and cover with potato starch (enough so it's not so sticky). Cut into 8 equal pieces, using a bench scraper or sharp knife covered in potato starch after each cut. Flatten out each piece a little more with your hands or a small rolling pin, working quickly, you want the dough to stay hot. Add a Tbsp or 2 of the bean filling to the middle of each piece and wrap the dough up around the filling, pinching together to seal well. The sealed part is the bottom of each daifuku. They can be wrapped in plastic wrap to stay fresh and freeze/thaw very well.

Tuesday, December 27, 2011

Plum Pudding for Christmas

Before I forget what I did here, I better write it down, because it was delicious.
I happen to have a pudding mold (of course I do) but this is unnecessary, you can use a heatproof bowl with a tight lid

Ingredients

  • 3 c lightly packed down crumbs from good white bread with the crusts on (about one half of a 1 lb loaf of bread, crumb-ified in the food processor)
  • 1 c each: black raisins, golden raisins, and prunes, chopped in the food processor
  • 1-1/3 c dark brown sugar (I like Muscovado sugar from India Tree)
  • 1/2 tsp cinnamon
  • 1/2 tsp mace
  • 1/2 tsp nutmeg
  • 1/4 tsp salt
  • 1 c butter, melted
  • 4 large eggs, lightly beaten
  • 1/8 tsp almond extract
  • 1/2 c bitter orange marmalade (seville orange marmalade from Trader Joe's works great)
  • 1/3 c spiced rum
  • 1/2 c cognac, heated on the stove before attempting to flambe
  • Sprigs of greenery like juniper and holly, optional
Procedure
Toss the bread crumbs in a large mixing bowl with the prunes, raisins, sugar, cinnamon, mace, nutmeg, and salt.

Then toss with the melted butter, and finally with the eggs, almond extract, orange marmalade, and rum.

Pack the pudding mixture into the greased steaming container (either a pudding mold with a tight fitting lid, or a bowl with a tight fitting lid) and cover with a piece of greased foil and snap the lid over the foil. Set the container in a stock pot, or whatever you will be steaming in, and add enough water to come a third of the way up the sides of the pudding. Cover the steaming pot tightly and bring to a boil, lower the heat to a simmer, and steam about 6 hours. Check every hour or so to make sure you're not losing too much water and top off if necessary.

Don't unmold it yet, it can be kept in the fridge about 4 months to mature. I made mine 2 days before and it was still delicious. Day of, bring it out of the fridge and allow it to come to room temp before unmolding the pudding. I decorated mine on a cake plate with holly and juniper, and set it out for decoration.

When ready to flambe, heat the cognac in a saucepan on the stove until hot but not boiling and pour the hot cognac into a sturdy pyrex measuring cup with a spout. Grab a long match and head to the table, hitting the lights on your way.

Pour some of the cognac on the pudding and ignite with the match, then pour the rest of the cognac on the pudding, allowing the stream to ignite. Don't worry if the flames crawl up into the pyrex, just keep pouring steadily- when it's empty, it will continue to burn inside the cup, but will soon go out- or you can blow it out like a big baby (me).
The holly catches fire. No biggie.


Tuesday, November 29, 2011

Blistered Shishito Peppers with Smoked Sea Salt

I tend to grow chiles in the garden (or Earthbox, usually) that are too hot to eat a lot of. Trouble is, pepper plants produce a TON of chiles, so I toddle outside throughout the season and collect a Serrano (or habanero or jalapeno or black cobra chile) or two for whatever dish I'm making and the rest of the thousands of chiles I grow are destined to be harvested, frozen, and eventually turned into hot sauce. Bell peppers are just okay for me, and anchos are kind of huge to just eat.
A few years ago, I was at Wine Vault & Bistro in Mission Hills and the waitress recommended Shishitos, since they were in season and kind of a rarity.

Holy.
Freaking.
Crap.

No, they're not spicy. OK, it's a little like Russian Roulette- about one pepper in 50 is spicy- but that's fun, right?

These are my favorite fried finger food type thing ever. These beat out french fries, calamari, onion rings, jalapeno poppers and anything else you can think of in this terribly guilt inducing fried finger food category. And here's the best part- they're not NEARLY as bad for you as any of those. They're not breaded, they don't need to be dipped in anything. They're like a fry that doesn't need ketchup and isn't made of starch! They're healthier and actually taste better than the unhealthy alternatives you're used to. And they're waaaaay less labor intensive to make- in fact, they whip up in about 5 minutes. When does that ever happen? Never, that's when.

Ingredients
Handful of shishito peppers with stems left on (can be found readily in asian markets when in season)
2 Tbsp peanut oil
2 big pinches of finishing salt (whatever you like to use when you really want the salt to be special/not something you'd dissolve into food- I have an applewood smoked sea salt from Dean & Deluca that I love with these)

Procedure
Heat the oil in a shallow saute pan until shimmering but not smoking.

Add the peppers (make sure they're dry or you'll have scary hot oil spattering everywhere) and give the pan a shake so they spread out.

Leave them alone for 30 seconds, then give them another shake. Leave them alone another 30 seconds, then use your tongs to check one. It should look like the skin is blistering/beginning to char a little. Once that happens, flip the peppers over and cook this way, shaking and flipping until they're nicely blistered. It should take no more than 5 minutes- you don't want them cooked all the way through to the point that they're completely floppy.

Remove from the pan onto paper towels and drain. Sprinkle well with salt, plate, then give them another hit of salt. Don't eat the stems, and try not to burn your mouth. :)

Wednesday, November 2, 2011

Vegan Agedashi Tofu

Agedashi Tofu is one of my favorite dishes. It's so simple and delicious. The sauce is the only thing about this that is traditionally not vegan, so it was easy to veganize without sacrificing flavor or texture or anything. The tofu should be like custard inside a light and crispy fried crust. I can never wait for it to cool and invariably burn the hell out of my mouth the first few bites.
Crispy on the outside, custardy on the inside, with a delicate, savory, sweet, and salty shiitake sauce.
1 package silken tofu (the kind that comes in the cardboard box, not the plastic water pack!)
2 Tbsp potato starch (cornstarch works fine too)
Salt & Pepper (my weird westernized preference, totally optional)
Oil for frying (I use corn or peanut)

1/2 c. vegetarian shiitake dashi (I buy granulated dashi you just add water to)
2 Tbsp. soy sauce
2 Tbsp. mirin
Green onions, sliced for garnish

Place a folded up paper towel on a plate and put the block of tofu on the paper towel. Cut the tofu with a sharp knife into cubes that you feel like you can handle without them falling apart. Small cubes are good, but they're very delicate. Gently spread out the cubes on the paper towel and drain for 10 minutes while you gather your other ingredients. Replace the paper towel by folding up another towel, laying it on the tofu cubes, place another plate on top, gently squeeze the plates together and flip the whole thing. Remove the top plate and wet paper towel that used to be on the bottom, and drain for another 10 minutes while you make the sauce.

Combine the dashi (or granules & water), soy, and mirin in a microwave safe dish and nuke for 1 minute. Stir and continue zapping, 1 minute at a time until hot.

Heat the oil to about 360F degrees. I usually don't check exact temps for frying, I just wait until the oil looks shimmery and then drop a test piece of food in to see if it sizzles how I like. You need enough oil to come up about halfway up the sides of the tofu cubes.

Put the potato or cornstarch (and salt and pepper, if using) in a container with a lid and add half the tofu cubes. Gently toss the tofu cubes so they're lightly coated. Don't do this step early- coat the tofu with the potato starch right before you fry them.

Add the tofu to the oil, try not to let them touch or they'll stick together, and fry for about 5 minutes on the first side. Then flip them over and fry for another 3-5 minutes, until they're golden brown.

Remove the tofu from the oil and drain on a paper towel. Fry the second batch and drain as well. Now would be a good time to zap the sauce for another 30 seconds to reheat. Add a few pieces of tofu to a small bowl and add some of the sauce. Sprinkle with green onion and serve.

Try not to burn your mouth. ;)

Thursday, September 15, 2011

Home-Cured Bacon

Curing bacon at home is easy, don't tell anyone
Ingredients
2 lb pork belly
1/8 cup kosher salt
1 tsp pink curing salt
2 Tbsp black pepper
2 bay leaves, crumbled
1/4 tsp fresh ground nutmeg
1/4 cup brown sugar, honey, agave nectar, or maple syrup
2 cloves of garlic, smashed
1 Tbsp juniper berries (optional)
5 sprigs fresh thyme (optional)
1/4 tsp red chile flakes (optional)

Procedure
Put everything but the belly and the sweetener in a 2 gallon zip top bag and mush it around.

Add the sweetener you’ve chosen and mush again.

Add the belly and rub it all up, making sure it has good contact with the goodies in the bag. Push all the air out by folding/rolling the bag over the belly, zip the top and put it in the fridge. After a few hours, check it and give it another good mushing, it will be easier this time because the cure will be liquified & the belly will have released some moisture.

I turn the belly once a day when I go into the fridge, but at a minimum, turn it after day 3, but just let it hang out in the fridge for a total of 7 days. 

After 7 days, you’ll notice the belly will be stiffer, it’s cured!

Take it out of the bag and rinse it off. Put it in a 200 degree oven for an hour and a half. 

Congratulations! It’s a BACON!

To cook a lot of slices at once, preheat oven to 400 and lay strips of bacon on a sheet pan. Cook for 8 minutes, then rotate pan and cook 8 to 10 minutes more until crispy and brown and bacony. Transfer to a pile of paper towels to drain.

ProTips
  • Pink salt is POISONOUS. For realz, don’t accidentally eat this stuff.
  • Pink curing salt is not the same as the pink colored Himalayan salt you find at fancy markets. Pink curing salt is sodium nitrite
  • If you have a smoker, swap out the 200 degree oven portion for an hour and a half in there with whatever wood you like (Maple syrup cured works well with maple wood; I like applewood with honey cured bacon; I like pecan wood with brown sugar cured bacon.)
  • Google “lardons” and prepare to weep with at beauty that is the lardon.
  • Bacon grease is fantastic to cook stuff in, don’t waste it.
  • Carve off slices as needed, rather than slicing it all up at once (unless you’re going to freeze it). Remember: less surface area = slower spoilage rate.