Showing posts with label Vegetarian. Show all posts

Saturday, July 1, 2017

Tomato Jam

The first ripe Indigo Rose tomato of the season
I see it's been 5 years since I've published a recipe. Let's get on with it.

Barrett and I grew Indigo Rose tomatoes in our 4' x 8' box at our community garden, Smarts Farm. As is so typical with beautiful things, they don't taste amazing. (jewelry, art, sunsets: do not eat) They're not awful or anything, I mean, they're garden fresh tomatoes, how bad can they be? But these won't win any taste competitions compared to many others you may grow in your garden.

So why the hell did we grow them? They're gorgeous.

They're prolific too, check out the background of that picture, all those shiny indigo things? We harvested about 3 pounds and after eating a pound of them as snacks, I decided to attempt to crank up their bland tomato flavor into something tomatoier and settled on jam.

Dude, this is going to revolutionize cheese and crackers for the month of July. It is holy shit good.

So if you find yourself in possession of tomatoes that need to get their shit together, I recommend this Tomato Jam.
Diced Indigo Rose, they're red inside

Ingredients


  • 2 lbs tomatoes, diced
  • 1 c granulated sugar
  • 2 Tbsp fresh squeezed lime juice
  • 1 Tbsp grated or minced ginger
  • 1 tsp ground cumin
  • 1 tsp salt
  • 1/4 tsp cinnamon
  • 1/8 tsp clove

Procedure

Dump all ingredients in heavy bottom saucepan or dutch oven, bring to a boil over medium high while stirring occasionally. 

Reduce heat to a simmer and cook, continuing to stir occasionally for 2 hours.


Friday, April 6, 2012

Sushi Class

Its been a while since I've posted, I've been busy as hell.
I did teach a sushi class though, well, technically 3 of them, and wanted to post those recipes. It was more hands on than my normal classes, that usually only have one hands-on element. Students all made their own sushi this time, I made and served just the hot food and dessert.
Here's the pdf of all the recipes, except for the daifuku, which is below.
Back row: Toro (tuna), Ebi (shrimp), Sake (salmon) and Avocado nigiri sushi, Inarizushi, Spicy California Gunkan Maki
Front Row: Tai (snapper), Hamachi (yellowtail) with Yuzu Ponzu, serrano chile and cilantro, Sake Rose (salmon) Sashimi
For hot food we made blistered shishito peppers with smoked sea salt, garlic chile edamame, and my quick and dirty miso soup.

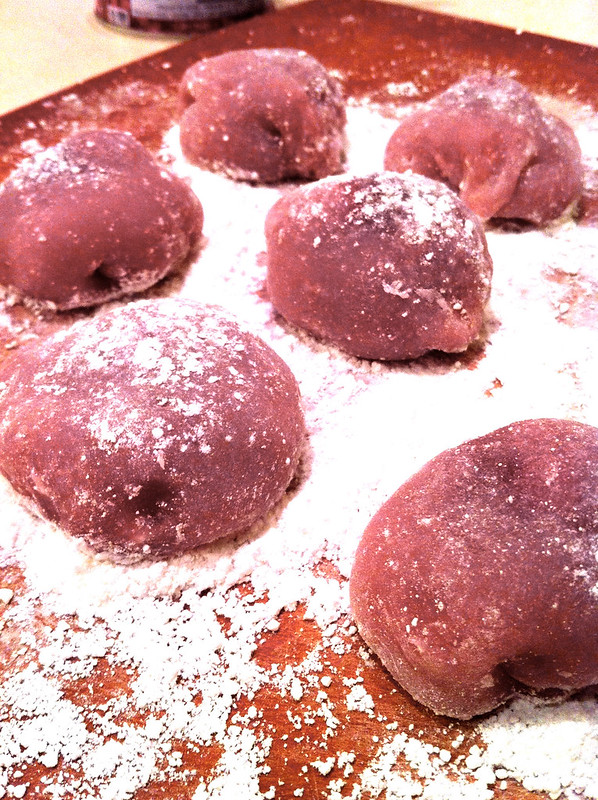
Pink Daifuku
For dessert, even though I knew I didn't have time to cover how to make them, I served homemade daifuku, a kind of mochi (sweet) that is a little unusual and class presented an excellent opportunity for me to give the students something to taste that they wouldn't normally seek out on their own. Not only is the flavor of daifuku odd for American palettes, but the texture is like nothing in our cuisine either. The best description I overheard one student give another was, "It's like gummy raw pie dough wrapped around refried beans with sugar in them." Yes, I suppose that's pretty accurate.

Daifuku Recipe

Filling Ingredients (makes enough for 2 daifuku recipes)

1 can Adzuki beans 14 oz
1/2 c water
1 c granulated sugar
1 Tbsp vegetable oil
Pinch of salt

Dough Ingredients

1 c Mochiko (white box with a blue star on it, Koda Farms brand of Sweet Rice Flour)
1/4 c granulated sugar
2/3 c water
Potato starch, for flouring the board (cornstarch works too)

Filling Procedure
Bring water and sugar to a boil and boil until sugar is dissolved and set aside to cool.
Drain and rinse the adzuki beans, and add to a saucepan over medium heat. Add oil, salt and 1/3 c of the sugar water syrup and mash the beans up with a potato masher. They should be the consistency of thick refried beans (add more sugar syrup if you need to). Heat until bean paste is hot and starts to look a little shiny. Set aside to cool.

Daifuku Procedure
Mix the dough ingredients in a microwave safe bowl (if you'd like to color them, mix in 1 or 2 drops of food coloring to the water before adding it to the rest of the ingredients- green and pink are traditional colors) making sure there are no lumps and there's no dough/residue stuck to the walls of the bowl, and cover with plastic wrap. Microwave on high for 2 minutes. Take it out and mix thoroughly. Cover it again and microwave for 1 minute more. If when you open the door, the dough deflates, it's ready. If your dough didn't inflate in the microwave yet, zap it again for another minute. It should deflate when you open the door.

Remove the dough from the microwave and scrape out onto a potato starch covered board. Pat the hot dough to flatten a bit and cover with potato starch (enough so it's not so sticky). Cut into 8 equal pieces, using a bench scraper or sharp knife covered in potato starch after each cut. Flatten out each piece a little more with your hands or a small rolling pin, working quickly, you want the dough to stay hot. Add a Tbsp or 2 of the bean filling to the middle of each piece and wrap the dough up around the filling, pinching together to seal well. The sealed part is the bottom of each daifuku. They can be wrapped in plastic wrap to stay fresh and freeze/thaw very well.

Tuesday, December 27, 2011

Plum Pudding for Christmas

Before I forget what I did here, I better write it down, because it was delicious.
I happen to have a pudding mold (of course I do) but this is unnecessary, you can use a heatproof bowl with a tight lid

Ingredients

  • 3 c lightly packed down crumbs from good white bread with the crusts on (about one half of a 1 lb loaf of bread, crumb-ified in the food processor)
  • 1 c each: black raisins, golden raisins, and prunes, chopped in the food processor
  • 1-1/3 c dark brown sugar (I like Muscovado sugar from India Tree)
  • 1/2 tsp cinnamon
  • 1/2 tsp mace
  • 1/2 tsp nutmeg
  • 1/4 tsp salt
  • 1 c butter, melted
  • 4 large eggs, lightly beaten
  • 1/8 tsp almond extract
  • 1/2 c bitter orange marmalade (seville orange marmalade from Trader Joe's works great)
  • 1/3 c spiced rum
  • 1/2 c cognac, heated on the stove before attempting to flambe
  • Sprigs of greenery like juniper and holly, optional
Procedure
Toss the bread crumbs in a large mixing bowl with the prunes, raisins, sugar, cinnamon, mace, nutmeg, and salt.

Then toss with the melted butter, and finally with the eggs, almond extract, orange marmalade, and rum.

Pack the pudding mixture into the greased steaming container (either a pudding mold with a tight fitting lid, or a bowl with a tight fitting lid) and cover with a piece of greased foil and snap the lid over the foil. Set the container in a stock pot, or whatever you will be steaming in, and add enough water to come a third of the way up the sides of the pudding. Cover the steaming pot tightly and bring to a boil, lower the heat to a simmer, and steam about 6 hours. Check every hour or so to make sure you're not losing too much water and top off if necessary.

Don't unmold it yet, it can be kept in the fridge about 4 months to mature. I made mine 2 days before and it was still delicious. Day of, bring it out of the fridge and allow it to come to room temp before unmolding the pudding. I decorated mine on a cake plate with holly and juniper, and set it out for decoration.

When ready to flambe, heat the cognac in a saucepan on the stove until hot but not boiling and pour the hot cognac into a sturdy pyrex measuring cup with a spout. Grab a long match and head to the table, hitting the lights on your way.

Pour some of the cognac on the pudding and ignite with the match, then pour the rest of the cognac on the pudding, allowing the stream to ignite. Don't worry if the flames crawl up into the pyrex, just keep pouring steadily- when it's empty, it will continue to burn inside the cup, but will soon go out- or you can blow it out like a big baby (me).
The holly catches fire. No biggie.


Tuesday, November 29, 2011

Blistered Shishito Peppers with Smoked Sea Salt

I tend to grow chiles in the garden (or Earthbox, usually) that are too hot to eat a lot of. Trouble is, pepper plants produce a TON of chiles, so I toddle outside throughout the season and collect a Serrano (or habanero or jalapeno or black cobra chile) or two for whatever dish I'm making and the rest of the thousands of chiles I grow are destined to be harvested, frozen, and eventually turned into hot sauce. Bell peppers are just okay for me, and anchos are kind of huge to just eat.
A few years ago, I was at Wine Vault & Bistro in Mission Hills and the waitress recommended Shishitos, since they were in season and kind of a rarity.

Holy.
Freaking.
Crap.

No, they're not spicy. OK, it's a little like Russian Roulette- about one pepper in 50 is spicy- but that's fun, right?

These are my favorite fried finger food type thing ever. These beat out french fries, calamari, onion rings, jalapeno poppers and anything else you can think of in this terribly guilt inducing fried finger food category. And here's the best part- they're not NEARLY as bad for you as any of those. They're not breaded, they don't need to be dipped in anything. They're like a fry that doesn't need ketchup and isn't made of starch! They're healthier and actually taste better than the unhealthy alternatives you're used to. And they're waaaaay less labor intensive to make- in fact, they whip up in about 5 minutes. When does that ever happen? Never, that's when.

Ingredients
Handful of shishito peppers with stems left on (can be found readily in asian markets when in season)
2 Tbsp peanut oil
2 big pinches of finishing salt (whatever you like to use when you really want the salt to be special/not something you'd dissolve into food- I have an applewood smoked sea salt from Dean & Deluca that I love with these)

Procedure
Heat the oil in a shallow saute pan until shimmering but not smoking.

Add the peppers (make sure they're dry or you'll have scary hot oil spattering everywhere) and give the pan a shake so they spread out.

Leave them alone for 30 seconds, then give them another shake. Leave them alone another 30 seconds, then use your tongs to check one. It should look like the skin is blistering/beginning to char a little. Once that happens, flip the peppers over and cook this way, shaking and flipping until they're nicely blistered. It should take no more than 5 minutes- you don't want them cooked all the way through to the point that they're completely floppy.

Remove from the pan onto paper towels and drain. Sprinkle well with salt, plate, then give them another hit of salt. Don't eat the stems, and try not to burn your mouth. :)

Thursday, September 15, 2011

Roasted Potato Leek Hash

Leeks are soft, so potatoes, garlic & sweets just added
Don’t relegate this recipe to breakfast only, it’s delicious as a side dish for lunch or dinner too.

Ingredients
1 leek, sliced thinly
1 sweet potato
1 russet potato
2 garlic cloves, minced
Olive oil
1/2 tsp. Salt
1/2 tsp. Pepper

Procedure
Grate the Russet and wrap grated potato tightly in paper towels to get rid of excess moisture. Grate the sweet potato.

Heat oil over medium high, add leeks and saute for a couple minutes. Add grated sweet potato, garlic, and Russet. Saute for 15 minutes, tossing ingredients around very occasionally.

ProTips
Browning occurs when ingredients sit in contact with a hot pan, so move stuff around in your pan infrequently for maximum tasty brownage.

French Toast Bread Pudding

Don't take them out before they're brown or they'll collapse too much, like souffles

This can be made as one big pudding, but the individual ones are very versatile and look more special.

Ingredients: 
(per 2 big muffin tins/4 regular size muffin tins)
1 burger bun, torn into 1” chunks
2 eggs
1/2 c. milk
1/2 c. cream
1 Tbsp. sugar
1/4 tsp. vanilla extract
pinch nutmeg
pinch cinnamon
pinch orange zest
2 Tbsp. raisins (golden is nice)
2 Tbsp. chopped pecans
Warm maple syrup 

Procedure
Preheat the oven to 350.

Butter 2 of the muffin tin spots if you’re using giant muffin tins, or 4 if you’re using regular size.

Put down a layer of bread chunks, then some raisins, then some more bread and top with more raisins.

Whisk the eggs, spices, vanilla, and sugars together in a medium bowl. Add milk and cream and whisk some more. Pour this custard mixture over the bread chunks.

Make sure bread gets moistened completely, cover and weight down the bread a little. Allow to soak for 30 minutes.

Sprinkle pecans on top, and bake for 30 minutes, until brown and puffed.

Allow to cool a little before serving with warm maple syrup.

ProTips
  • Be careful when you press down on the bread to moisten that you don’t overflow your muffin tin.
  • Make sure these are good and browned when you pull them out. If you pull them out when they’re too underdone, they’ll collapse a lot as they cool.
  • Maple syrup is not maple flavored syrup or pancake syrup (basically flavored corn syrups). It comes from a sugar maple tree and has one ingredient: Maple Syrup. Grade B is more flavorful and darker than Grade A- kind of counter intuitive, but I prefer the Grade B syrup.
  • To turn this into a dessert, serve with whipped cream, ice cream, or creme anglaise. Melted vanilla ice cream is essentially creme anglaise, that fancy whitish custardy sauce many plated desserts are served with. The microwave and some good vanilla ice cream make a really quick creme anglaise, which is awesome on this bread pudding.
  • Variations besides raisin & pecan: dark chocolate chunks and orange marmalade, white chocolate chunks and dried cranberries, cream cheese chunks and fresh berries (blueberries, raspberries and/or strawberries)

Savory Baked Egg in Tomato

With a Tangeringe Mimosa, Roasted Leek Hash,
House-cured Bacon,
and French Toast Bread Pudding
This recipe scales really really well, so if you’ve got family coming for breakfast and brunch, this is a great choice. On the other end of the spectrum, this is an easy, mostly hands off, thing to make for one (or two; hubba hubba!) in the morning.

Ingredients
1 tomato with a fat bottom
1 egg
1 tsp grated Parmesan
pinch salt
pinch pepper
herbs for garnish

Procedure
Preheat oven to 425.

Slice the top off the tomato, and carefully scrape out the pulp, but don’t dig too deep at the bottom.

Sprinkle the insides with salt, pepper, and cheese, turning and shaking, so the cheese gets on the sides too.

Spray a baking sheet with olive oil/Pam and set the tomato on the baking sheet. Crack an egg into the cavity.

Bake for 20 minutes for soft but thick yoks, adjust by 5 mins in either direction depending on how done you like your eggs.

Sprinkle with desired herbs and serve.

ProTips
  • Serve these on a bed of hash to soak up eggy tomato goodness.
  • If you’re doing a big batch of these, they may take more time. Just check for doneness by jiggling the pan a little.
  • Depending on your mood or what you’re serving these with, you can vary these with the herbs you choose to add at the end. Oregano and basil are lovely for an Italian tomato egg; Mexican oregano, cilantro, and chili powder are great for a Mexi egg; thyme and marjoram make a good French egg. Fresh herbs are better, but dry are just fine for this (except cilantro- for the love of all that is holy, never buy dried cilantro. WTF is wrong with you!?)

Tangerine Mimosa

Brunchy goodness

If you like mimosas, shake it up a bit by using tangerine juice instead of the usual orange juice. You can juice your own, or buy a little container of tangerine juice in the produce section of your grocery store. If it’s too tart, add more Chambord.

Ingredients
3 oz. Champagne
1 oz. tangerine juice
splash of Chambord
raspberry for garnish

Procedure
Add to a champagne glass in this order: Champagne, juice, chambord. Garnish with raspberry and drink that sucka!

ProTips
  • Use Asti Spumanti (an Italian sparkling wine) for when people think they don’t like Champagne, it’s sweeter.
  • Only sparkling white wine from Champagne, France is actually “Champagne.” Everything else is sparkling wine.
  • Cava is sparkling wine from Spain and is a good value usually.
  • “Brut” means dry, and is pronounced “broot.” The opposite of that is “Sec,” or sweet. “Demi” means “a little.” So “demi sec” on a sparkling
  • wine label means it’s a little sweeter than brut. And “Extra Brut” means it’s a pretty tart/dry sparkling wine, with minimal sweetness.

Friday, September 2, 2011

Margarita Perfecto

These are not for the faint of heart, it turns out
Margarita Mix is gross, and that's not how we do.

Ingredients

4 parts Awesomest Tequila you can get
4 parts Fresh Squeezed Lime Juice (from about 4 limes save the corpses)
4 parts Fresh Squeezed Orange Juice (from 1 orange)
2 parts Cointreau
1 part Grand Marnier
ice cubes
kosher salt
Lime wedges to garnish

Procedure
Squeeze/wipe lime corpse around glass rims and press into kosher salt. 
Fill salt rimmed glasses with ice.
Combine juices, Cointreau, and Tequila in a cocktail shaker and shake until the ice sounds different. 
Strain over ice into the salted glasses, float Grand Marnier, on the top, and garnish with a lime slice.

ProTips
  • Buy bags of limes and store in the freezer. To defrost, zap for 30 seconds in the microwave (maybe twice). Beware, your limes will now be very juicy because the ice crystals ruptured all the membranes holding the juice. Awesome!
  • You’ll notice this recipe has very few actual ingredients, which means it’s REALLY important they’re all the best you can get. You’re saving a bundle drinking at home already, so buy yourself some nice tequila, k?
  • If you need to make a pitcher of these, look in the produce section for fresh squeezed orange juice (to spot the real deal, it will look separated, with water on top and pulp at the bottom probably) and consider using limeade if you can find it (less added sweetener, the better), don’t use those weird plastic limes though.


Obligatory Satan/Seitan Pun Here

What are those, pork chops? No! They're vegan mock meat cutlets called Seitan, and they're very tasty.

I really like seitan but the pre-packaged stuff is pricey for something that I heard was easy to make. And so I set about making some, and found that it was super easy indeed. And delicious too. I don't think I'll ever buy it again, in fact.

Ingredients

  • 6 cups vegetable broth (I make mine from scratch or using this vegetable soup base from Penzey's)
  • 1 onion roughly chopped
  • 1 cup vital wheat gluten
  • 1 tsp ginger powder
  • 2 cloves minced garlic (or squish in press)
  • 3/4 cup vegetable broth
  • 2 tbsp soy sauce
Procedure
Bring 6 cups of vegetable broth to a simmer and add onion.

Mix gluten, ginger and minced garlic thoroughly- you'll have trouble mixing them in once the liquid gets added. Add 3/4 c. vegetable broth and soy sauce and mix to combine. I used my KitchenAid stand mixer for this, but anything less probably will struggle/burn out, so if you don't have one, use a strong spoon until it comes together enough that you can turn it out and knead it. Knead for a minute at a time, by hand, or 30 seconds at a time in the mixer, and rest for 2 minutes between and knead again. It will wind up looking and feeling like chewed lumpy bubble gum.

Portion the dough into 6 pieces and roll out into cutlets about half an inch thick with a rolling pin. Focus on thinning the center of the cutlets a little more than the edges because they'll puff and swell with cooking, and don't worry that there's tears or holes in the dough.
Simmering in broth

Add the cutlets to the simmering broth, cover and simmer for 1 hour and 15 minutes. I used a pressure cooker and cooked them for 45 minutes.

Once they're done, you can use them like you would use a piece of meat. They're fully cooked, but if you want to do additional things to them, that's fine too. Once mine were done simmering, I chopped up a cutlet into cubes, sauteed them with a bit of oil in a pan to get some nice brown and crispy bits, tossed it with hot sauce and made myself some DELICIOUS little tacos.
Spicy Seitan Street Tacos with Salsa de Arbol and fresh homemade tortillas 

The cutlets also freeze very well, so just let them cool and slip into ziploc bags to freeze. Then you can pull them out and bread and fry them like chicken fried steaks, make seitan parmesan, use them as a patty on a sandwich, cube them up to make something like a curried chicken salad...whatever your heart desires.

Wednesday, August 31, 2011

White Sauce for Fish or Feesh Tacos

Feesh Taco (fried tofu)
Ingredients
1 part Mayo (I use vegenaise when I'm veganizing this)
2 parts Yogurt (I use So Delicious cultured coconut "yogurt" when I'm veganizing this too)
squeeze Lime Juice 
1 garlic clove, minced
big pinch Salt 
dash Hot sauce or Adobo (Open a can of chipotle chiles en adobo and dig out a teaspoon of the sauce- that's adobo)

Procedure
Just mix it all together and put on your fish tacos, or your feesh tacos (my fake vegan version with fried tofu replacing the fish)


Chile de Arbol Salsa

Right after pouring on the boiling water, the water gets a little yellow. The water will look like tea after an hour.

Ingredients
1 c. Chiles de Arbol, seeds shaken out
2 c. boiling Water to soak chiles
1/2 cup vinegar (red wine, white wine, cider, and rice vinegar are all good, even white vinegar will work)
1 tsp. ground Mexican Oregano
2 cloves Garlic
2 tsp. Salt 


Procedure
The procedure for making chile paste is outlined in detailed in this post, where I used Ancho chiles. But what you'll want to do, simply, is pour the boiling water over the chiles and allow them to soak for about an hour. Then drain off enough of the soaking liquid so that there's enough for your blender to "catch," and puree the chiles to make chile paste.
Add the vinegar, oregano, garlic and salt and puree again. Adjust for consistency and taste. If it's too acidic and too thick, you can add water instead of more vinegar.

Friday, August 26, 2011

Authentic Handmade Corn Tortillas


For neater edges, add more water and be sure to wet your hands before rolling dough into balls

If you think you don’t like corn tortillas, it’s because you’ve never had a handmade tortilla that’s still too hot for any sane person to eat. I don’t like packaged corn tortillas either, they taste like cardboard with a texture like sand. They’re cheap and quick to make at home- faster than going to the store for tortillas.

Ingredients
Maseca brand masa flour
Salt
Water

Procedure
This is stupid easy. You follow the directions on the bag with some minor modifications. Double the salt and use boiling water instead of warm. 

Mix your dough with a dough scraper or spoon and then switch to kneading by hand until it’s smooth and not sticky. 

Roll it into a log, then cut into even pieces for the batch you’re making. 

Once your log is cut into discs, wet your hands a little and roll each piece into a ball. Cover your collection of balls with a damp paper towel. 

Heat a nonstick skillet over medium heat, and if you’ve got more than one, fire ‘em up! You can cook a whole batch in no time at all.

I don’t have a tortilla press, honestly every time I’ve used one I’ve screwed it up in some new and different way. Just use a gallon ziploc bag, cut so it opens like a book and 2 big heavy hardback books. Put the first book on your counter, then lay the ziploc on top and open it up like a book. Put one dough ball in the center of the ziploc, close your ziploc “book” to cover, then top with the other heavy book and press down hard! Or move the whole setup to the floor and stand on it. Take off the top book and peel one side of the ziploc off the dough, then peel the other side off the dough.

Toss your uncooked tortilla in the pan and cook for 1 minute, flip (quit your whining and just use your fingers, everything else sucks.) and cook for 1 minute more.

ProTips
  • Don’t try to peel the tortilla off the ziploc, peel the ziploc off the tortilla or it will rip! 
  • If you preheat your oven to its lowest setting, then turn it off, you can stack your tortillas in there as they come off the stove and they’ll stay warm. Cover them with a damp paper towel.
  • These are fantastic with butter, but Chili honey butter is AMAZING (butter, chili powder, honey, nuke in microwave for 10 seconds and stir together)
  • To freeze, stack between pieces of parchment, allow them to cool completely, then slide into a big ziploc and freeze flat. To defrost, nuke tortillas for 10 seconds at a time, flipping after each zap, until hot (about a minute). A big batch can be wrapped in foil and heated in the oven.


Quick and Easy Black Beans

I'm ashamed to call this a recipe
Delicious, but embarrassingly simple. Mumble about how complicated they are to make when you bring these to a party and get asked for the recipe.

Ingredients
1 can of black beans
1/2 c. of your favorite salsa from a jar
2 Tbsp Panela cheese (omit to make vegan)
thin strips of red chile (optional)

Procedure
Dump in can of beans and salsa and stir to combine. Cover, and heat until bubbling, stirring occasionally to make sure beans are not scorching at the bottom. When bubbling, turn heat to low and check consistency- if you want beans thicker, remove lid and cook until desired consistency is reached. If thinner/looser beans are required, add water and stir until heated through again.
Transfer to plates or a serving dish and garnish with crumbled Panela. Top with vibrant red chile strips, if using.

ProTips
  • Alternative salsa suggestions: Tomatillo (green), Chipotle, Peach Habañero
  • Also good garnished with cilantro


Enselada de Elote

For easier eating than on the cob, try this!

Elote means “corn,” but it’s synonymous with how corn is prepared at markets and fairs all over San Diego. If you’ve seen the tables near the corn on the cob at the fair, covered in condiments and wondered what they hell they were for, they were for dressing your corn up, Mexi-style. Now in a salad!

Ingredients
1/2 c. mayo (use vegenaise if that's your thing)
1 lime, juiced
1 Tbsp. chili powder
1 garlic clove, minced
1/4 c. grated Parmesan or Pecorino Romano (omit to make vegan)
1/2 bag of frozen corn (thawed)
1/4 red onion, diced
2 Tbsp. chopped cilantro
Salt to taste


Procedure
In a large bowl, add mayo, lime, chili powder, garlic and cheese. Stir to combine.

Add remaining ingredients and gently toss to mix through and coat with mayo mixture.

Transfer to plates or a serving dish and AAAAAAAWWWWWW YEEEEEEEAAAAAH!


ProTips
  • Great to make up to 1 day ahead and take to parties.
  • Trader Joe’s sells awesome frozen grilled corn, highly recommended for this application.


Restaurant-Style Guacamole

Little plate on big plate for much improved presentation over plastic tub and bag of chips

Great guacamole doesn’t need a lot of fussing, or mystery flavor packets from the supermarket, just a little prep and you too can be making authentic and delicious guac just like you’d get for ten bucks at a nice restaurant.

Ingredients
For each avocado:
1 Tbsp. small dice tomato, drained
1 Tbsp. small dice red onion
1 Tbsp. small dice red pepper
1 Tbsp. chopped fresh cilantro leaves
1 tsp. fresh squeezed lime juice
1 garlic clove, minced
1/2 tsp. salt
1/2 tsp. finely minced serrano/jalapeno (optional)

Procedure
As you prep ingredients, put them in a bowl (not the serving bowl, you savage!): Dice your onion, add to the bowl; dice the pepper, add to the bowl; and so on, until the LAST thing you add is the avocado. 

Avocados should be sliced through their poles to the pit, and twist to separate. Set aside the half with the pit, and get to work on the other half- slice through the fruit along its length, to the skin, but not through it. Turn the avocado in your hand and repeat through the width of the fruit. You should be slicing a crosshatch pattern in the fruit, while leaving the skin intact. Set that half aside. Position the other half on the counter and give the seed a good whack with your knife, so it embeds in the pit. Pick up that half and twist to remove the pit. Repeat cross hatching pattern with your newly pitless avocado half.

Fold the avocado in half over the bowl and squeeze out the chunks, like you’re squeezing toothpaste from a tube- squeeze from the bottom. Now all you have to do is mix it all up with a fork, mashing any chunks that are too big for your liking. Just keep mashing until you like what you see. Taste it and add more salt, cilantro, or lime juice as necessary (if you don’t know what it needs, it needs salt!), when it’s good, and only then, spoon it into the serving dish.

ProTips
  • Recipe is designed to scale! Big party = big guac 
  • Salt, lime, cilantro and onion are key- everything else is nice to have. 
  • Eyeball this one, don’t bust out measuring tools.
  • For max juice from citrus, zap in microwave for 30 seconds before you cut them in half OR roll them on the counter to squish and free juice.
  • To get leaves without stems from a bunch of cilantro, shave that puppy!
  • To remove the pit from your knife, pinch the blade behind the pit and it will pop right off. 
  • To drain diced tomatoes, salt them and throw them in a little bowl on a folded paper towel to soak up the liquid. I usually prep them first so they have maximum drainage time so they don’t make the guac watery.


Monday, August 22, 2011

Vegan Katsu Dinner

Japanese dinner comes together quickly if your freezer and pantry are well stocked

This dinner was made up of a bunch of little things. I prefer to eat this way, with just a few bites of each dish and lots of variety.

The revelation for me was using spicy boca chick'n patties as my katsu (cutlet). Once I heated the patty up in a skillet, toasting the breading in the process, and sliced it up with katsu sauce (kinda like a bbq sauce, recipe follows), this dish was exactly like regular ol' tonkastu- maybe lighter and less greasy!

I served my katsu with:

  • Zaru cha soba - cold green tea buckwheat noodles. Be sure to rinse/wash well with plenty of cold water after cooking. This was simply tossed with sesame oil and toasted sesame seeds. 
  • Inarizushi - the two pouches made of fried tofu skin, stuffed with sushi rice. (recipe follows)
  • Seasoned Tomato - fresh tomato slices sprinkled with Penzey's buttermilk ranch herb mix- a weird choice, I know
  • Seaweed salad with cucumber and red onion (recipe follows)
  • Edamame with smoked sea salt - nuke frozen soybeans and a Tbsp. of water in a covered dish in the microwave
  • Gari - young sweet pickled ginger, like you'd get with sushi
  • Umeboshi - pickled plum with a strong flavor- I like to nibble a little before taking a bite of inarizushi


Katsu Sauce
Mix together:

  • 1/2 c. Ketchup
  • 1 Tbsp. Worcestershire sauce
  • 2 Tbsp. Soy Sauce
  • 1 tsp. Dry Mustard Powder
  • 1 tsp. Sriracha sauce


Sushi Rice Dressing
Mix together:

  • 2 Tbsp. Rice vinegar
  • 2 Tbsp. water
  • 2 tsp. agave nectar 

Pour over 2 cups of cooked white short grain rice (I use Botan Calrose) and toss gently to coat each grain of rice with the dressing and cool it down quickly.

Seaweed Salad with Cucumber and Red Onion

  • 2 Tbsp. sliced wakame or seaweed of your choice, reconstituted in cold water (5-10 minutes)
  • 1/2 inch of cucumber
  • red onion
  • 1 Tbsp. rice vinegar
  • 1 Tbsp sesame oil
  • 1 tsp. soy sauce
  • 1/2 tsp. agave nectar
  • salt to taste 

Shave red onion with the thinnest setting of a mandoline/japanese slicer until you have about 1 Tbsp of onion ribbons. Microwave on high for 30 seconds in a dish full of water. Drain and pat dry. This process takes a lot of the harsh bite out of raw onions.
Shave cucumber on the same setting.
Stir together remaining ingredients to make dressing and toss with seaweed, onion and cucumber.

Friday, August 19, 2011

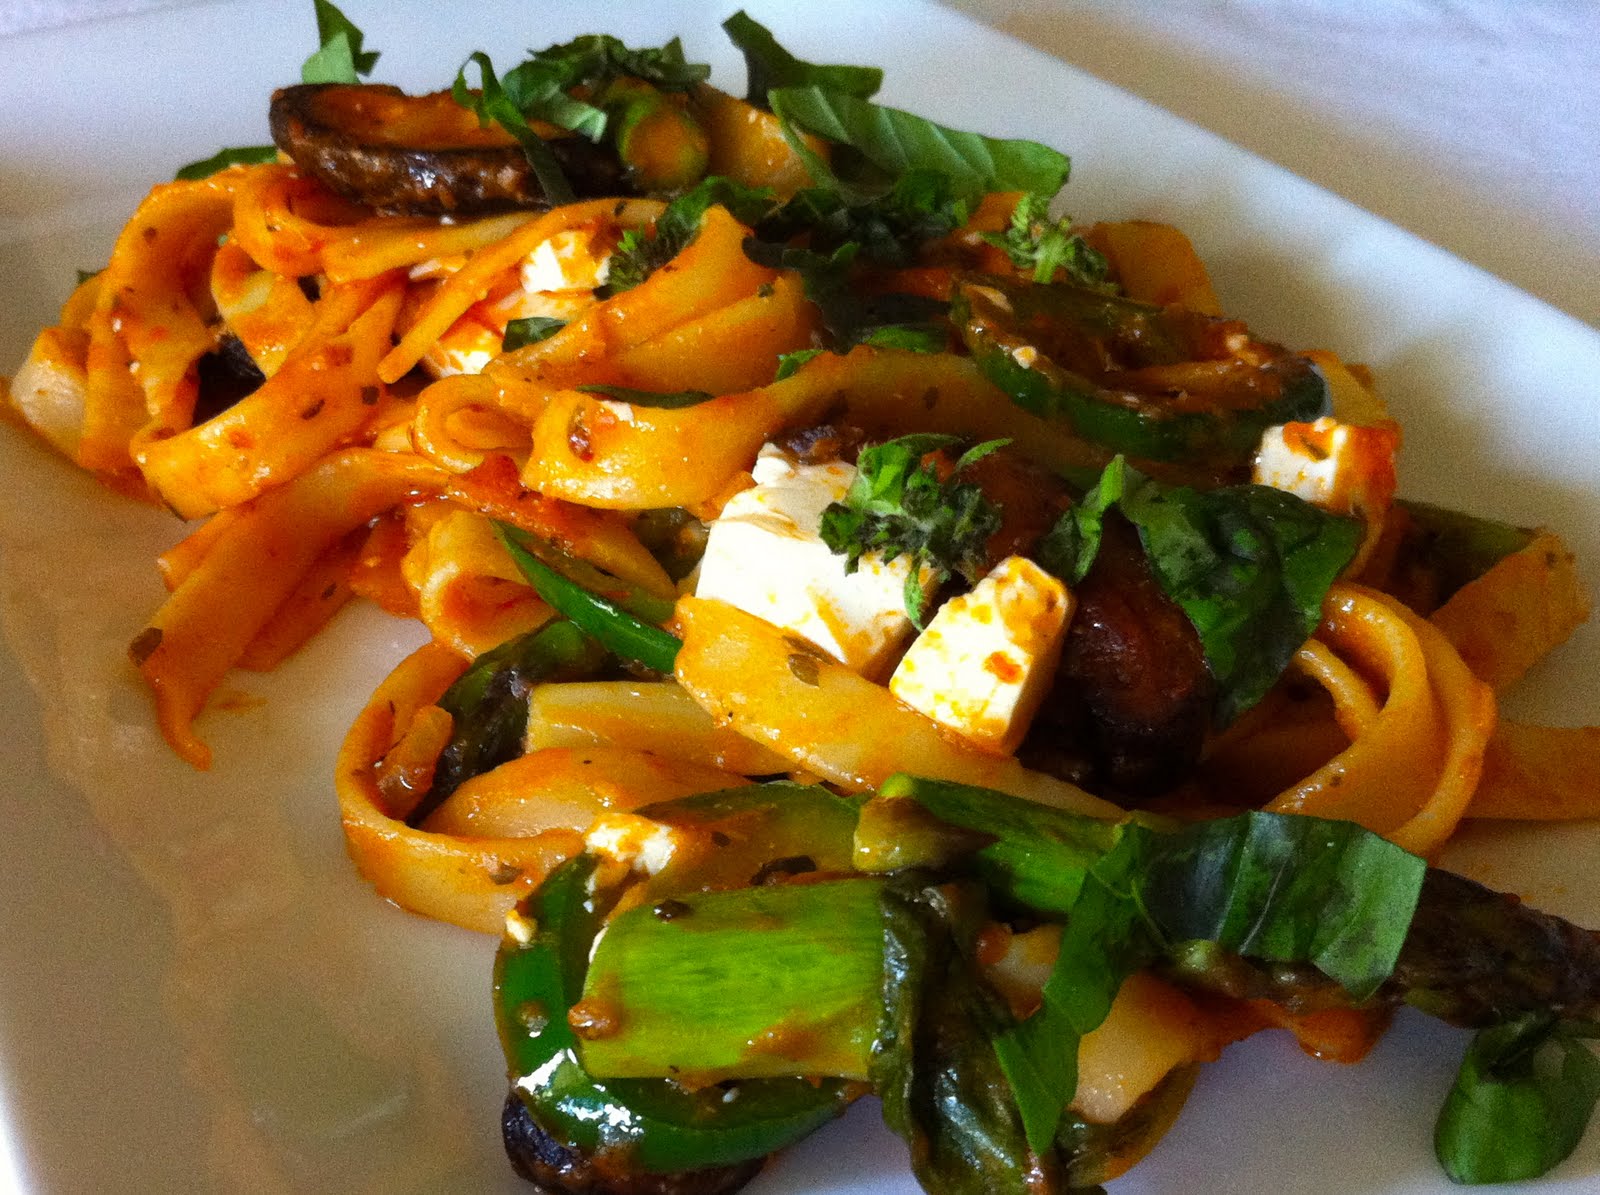
Fettuccine Arrabiata with Asparagus, Shiitake Mushrooms and Mock Mozzarella

Lunch of the gods

  • 1 serving Cooked Fettuccine
  • 1/2 c. Marinara Sauce (recipe follows)
  • 2 oz. Mock fresh mozzarella cubes (recipe follows)
  • 1 Jalapeno pepper, seeded and sliced
  • 4 shiitake mushrooms 
  • 2 asparagus spears, sliced into 1 inch pieces
  • 1 tsp. red chile flakes
  • 1 Tbsp. olive oil
  • salt and pepper to taste
  • Fresh basil garnish


Heat a large pan over medium heat and add olive oil. Saute mushrooms until well cooked, about 5-10 minutes. Add jalapenos and asparagus and saute until barely cooked/still crunchy, about 3 minutes. Stir in red chile flakes and marinara sauce and heat through. Add cooked pasta and stir to combine and heat through. Add mock fresh mozzarella cubes and heat through. Taste and adjust with salt and pepper. Serve with fresh basil garnish.

Marinara Sauce
1 14 oz. can Crushed Tomatoes
1/4 c. finely diced onion
1 big clove garlic, minced/pressed
2 tsp. Dried Italian Oregano
1 tsp. Dried basil
1/2 tsp. Dried Thyme
olive oil
salt

Heat a skillet over medium heat and coat the bottom with a little olive oil. Add onion and saute until translucent (3 minutes). Add garlic and herbs and stir to combine. Stir in tomatoes and raise the heat to bring to a boil, stirring often. Once boiling, lower heat to low and simmer for 30 minutes. Taste and add salt.

Mock Fresh Mozzarella
1 block firm tofu
2 tsp. salt
juice from 1 lemon
1 c. cold water

Press firm tofu for 30 minutes between plates, cutting boards, whatever. Combine water, lemon juice and salt in a ziploc bag, add tofu, and marinate for 30 minutes. Slice into 1/2 inch cubes.

First, locate the teats on your cashew...

I've been buying almond, coconut, and/or soy milk instead of milk for quite some time now. Recently I concluded that making nut milk shouldn't be that hard and googled around for guidance. I think I have this process pretty streamlined, have stuff to say, and am ready to document it, so here goes:

Cashew Milk
Cashew milk is flipping delicious and easy to make, so if you want to try making nut milk, I highly recommend starting with cashew. If you have a kick ass blender (vita-mix, blendtec, etc.) you won't even need a nut milk bag/fine mesh to strain it, because you won't need to strain it at all.


  1. Get RAW un-dicked around with cashews. No salt, no whatever else. I buy them in the bulk bin now. You will need about 1 cup of cashews to make 3 cups of cashew milk.
  2. Soak them in plenty of water for a few hours or even overnight. You can soak them in the pitcher of your blender, so you don't dirty another thing in the kitchen. 
  3. Strain and rinse them off.
  4. Add them back to the blender pitcher and add just enough fresh cold water to cover. I use filtered water from my Brita for this.
  5. Blend on your blender's juice setting (my Blendtec starts out slow, then beats the crap out of them for maybe a minute and a half on this setting).
  6. Behold your cashew cream! Depending on what you're up to, you might need to stop here. More on that later.
  7. Add in the rest of the water (up to the 3 cup mark is a good place to start) and put the lid back on securely. I shake the pitcher at this point to basically wash down the sides.
  8. Blend again on the whole juice setting.
  9. Check it out! It looks like milk! 

At this point it tastes very very neutral, so give it a taste and adjust for the consistency you like. If it's too creamy, just add more cold filtered water. I also like to buzz in a pinch of sea salt, a tiny bit of maple syrup, a tiny bit of vanilla extract, and a tiny pinch of cinnamon. If you go overboard on that stuff, it tastes like Horchata, which is damn awesome, as well.

If you find, as I have, that you'll want to make a 3 cup batch of this every week, I recommend soaking a big batch of cashews all at once, then portioning them out into ziploc bags for the freezer. If you don't want to wait 20 minutes while they thaw a little, they can be zapped in the microwave for 30 seconds when you're ready to make milk, so the whole process from using pre-soaked, frozen cashews takes only five minutes.

Other ideas
Double Honey Nut Cheerios 
Flavor your nut milk with honey and a pinch of salt and pour over your Honey Nut Cheerios. OMG Sweet Jesus.
Honey Nut Semi Freddo
Make honey nut semi-freddo by flavoring the cashew cream with plenty of honey and a good pinch of salt and freezing it. It should be too sweet to eat before you freeze it because freezing dulls the sweetness quite a bit. I stirred it once or twice as it was freezing too. This was amazingly good. I think I'm going to try this with hazelnut cream and chocolate next.
Coffee Cream
Coffee cream can be made by adding less water than when making milk, and can, of course be flavored however you like.
Chocolate Cashew Milk
Mix 1 Tbsp. agave nectar with 1 Tbsp. cocoa powder and a pinch of salt until it looks like Hershey's chocolate syrup. Add a little cashew milk to thin and stir until dissolved. Add more cashew milk until it tastes the way you want.
Delicious Cashew Spread
Start with 1 cup of extra thick cashew cream and add 2 Tbsp. nutritional yeast, chopped fresh herbs, cracked black pepper, and garlic (or any combination of that stuff- this combo tastes a lot like Boursin cheese). Awesome on crackers, crudite, and baked potatoes.
Creamy coffee!

Friday, May 20, 2011

Crepes

This recipe is my favorite crepe recipe because it produces the absolute thinnest crepes AND the batter doesn't need to rest because it doesn't use flour and so mixing it doesn't produce gluten. It's adapted from The Cake Bible and I've used it for years with great success. (Please pardon my bed-head, it was Sunday morning and I'd just rolled out of bed into the kitchen.)
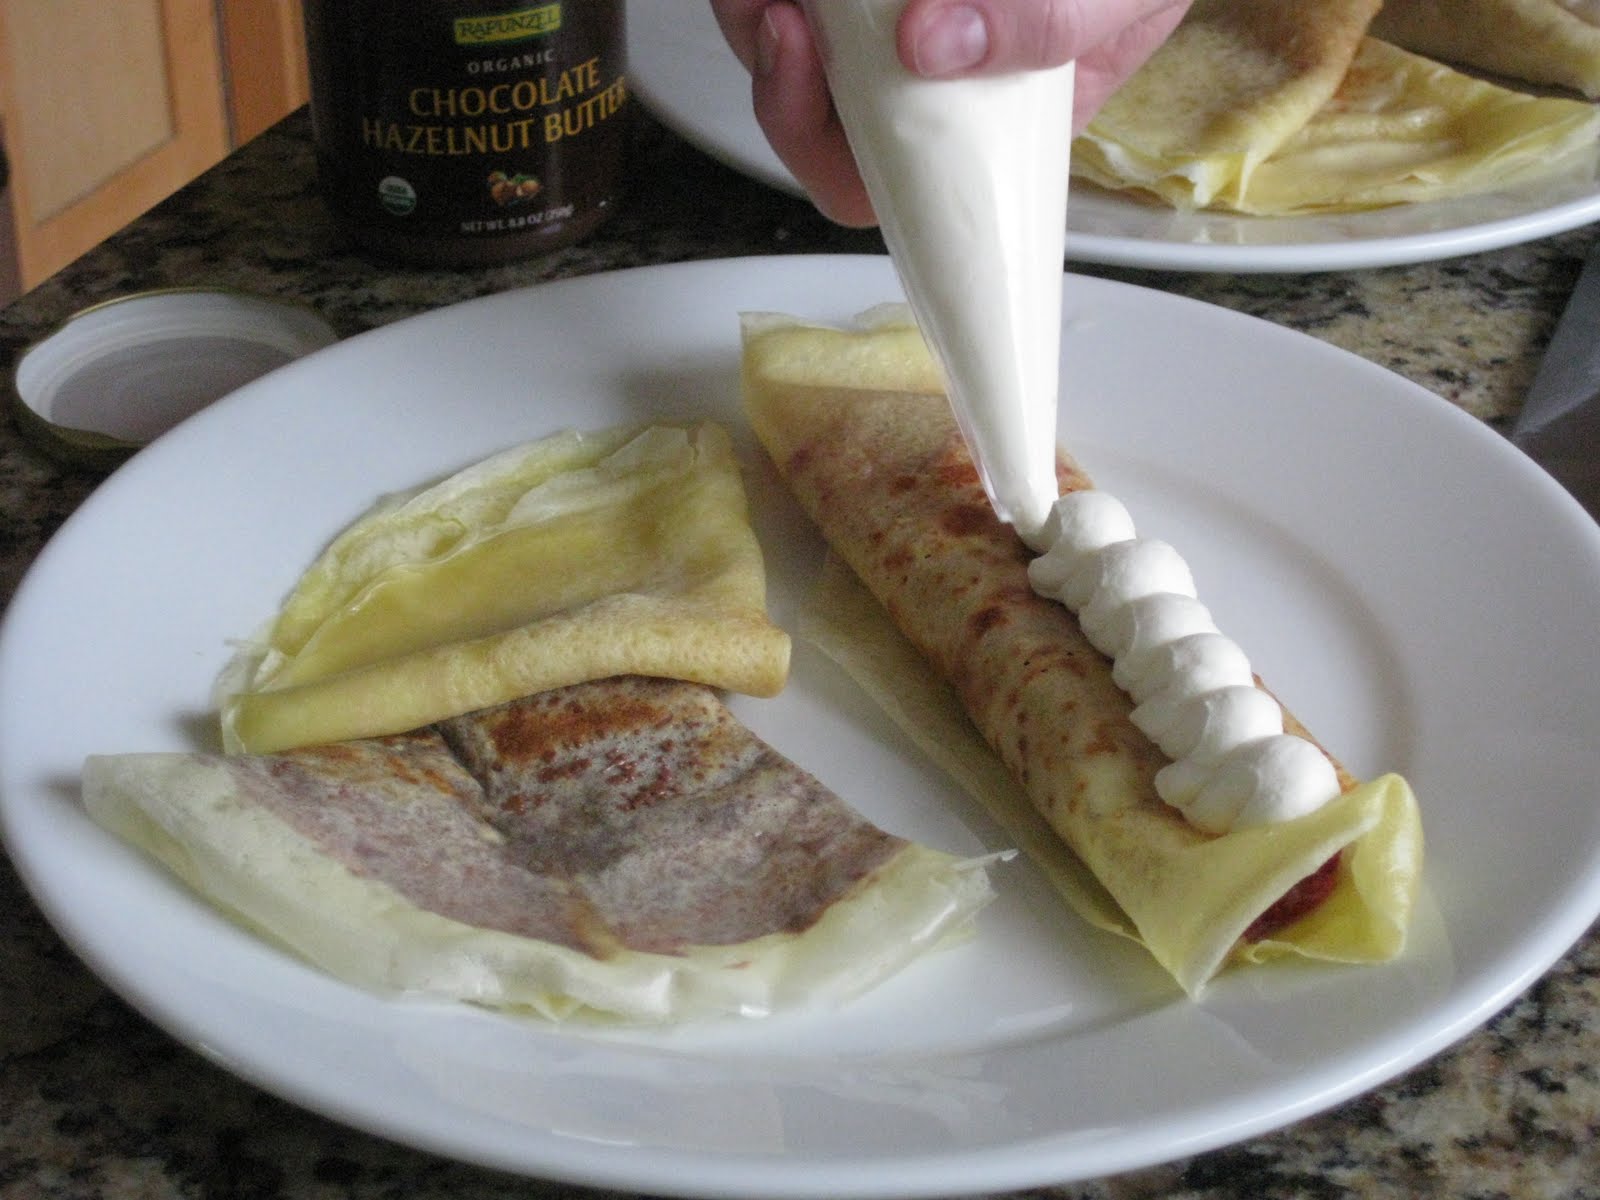
Strawberry jam filled crepe getting dressed with whipped cream; Lemon sugar crepe; Nutella impostor crepe
Ingredients
3 eggs
1 c milk
3 Tbsp unsalted butter, melted
3/4 c cornstarch
1/8 tsp salt


For Sweet Crepes:
1 Tbsp sugar
1 Tbsp Grand Marnier


For Savory Crepes:
handful of rough chopped fresh herbs
or
1/2 tsp Dijon mustard


Clarified butter for cooking the crepes (just nuke butter until melted and scrape off/fish out the white bits, leaving clear yellow goodness)


Procedure
Place the ingredients (except clarified butter), in the order given, in a blender and blend at high speed for 30 seconds.


Heat a crepe pan on medium-high heat until hot enough to sizzle a drop of water. Brush the pan lightly with clarified butter and pour 2 tablespoons of batter into the center of the pan. Immediately tilt the pan to the left and then down and around to the right so that the batter moves in a counterclockwise direction, swirling to cover the entire pan.


For the thinnest possible crepes, pour excess batter immediately back into the blender with the rest of the batter. So, to recap: Pour in batter, swirl around fast, quickly dump extra back where it came from and return to heat. This should all happen quickly- otherwise, adjust the thing you're using to pour in your batter so you're pouring in exactly the right amount. 1/4 cup measure giving you too much batter in your pan? Try another scooper that's smaller.
Cook until the top loses it's shine and starts to dull and the edges begin to look dry and lacey, about 20 seconds. Use a small metal spatula to lift the edge, check to see if the crepe is speckled with brown underneath, then flip the crepe with your fingers and cook for about another 15 seconds.
I have a blue steel crepe pan. No Really. I use my offset icing spatula for crepes, it's thin and easy to handle.
You can fill them however you like but I like mine brushed with melted butter, sprinkled with sugar and a squeeze of lemon.
Breakfast of Champions!