 |
| Mr. Crankypants out of the tank |
They ended up being enormous though, so when I got home, called a couple of friends over to help eat them/beat them into submission. Also the dog thought the lobster was awesome. After some sniffing and poking with her nose, she tentatively bit the lobster’s head and looked up at me for further instruction. I put the lobster back in the sink with his buddy instead. Ain’t no dog of mine eating a $30 lobster.
All 4 of us were involved in the epic adventure that was cooking lobster, and it did wind up being quite a messy and absurd production, but overall, it was relatively easy and we wound up with a delicious dinner.
 |
| Mr. Crankypants visits the sink |
Things I learned:
- 6 lbs of lobster takes about 20 minutes to cook in boiling water.
- Leave the rubber bands on the claws until they come out of the pot.
- Put the lobsters in head first to kill them quickly.
- They don’t scream, whistle or otherwise put up a fuss.
I worked myself into quite the tizzy before putting them in but that part was pretty uneventful- you just pick them up by the body piece, behind their big claws and drop them in.
 |
| Not so tough now, are you? |
That night, however, I served the lobster simply with butter that I clarified in the microwave (nuke until melted and starting to foam, fish out the foam and white solids with a spoon so all that’s left is clear yellow butter), baked russet potatoes with sour cream, and tender young asparagus steamed in the microwave.
So this is what we did with the leftovers on Monday night (after a whole day of work, I might add)...
Lobster Ravioli with Champagne Cream Sauce
Make the filling first.
Filling Ingredients
2 Tbsp butter
1 Tbsp olive oil
2 Tbsp. finely minced shallots
1 big garlic clove, minced/pressed through a garlic press
~8 oz. lobster meat
zest from 1 lemon
2 Tbsp. finely minced fennel (fronds and/or stalks)
1/4 c. ricotta cheese
sea salt
white pepper
Filling Procedure
1 Tbsp olive oil
2 Tbsp. finely minced shallots
1 big garlic clove, minced/pressed through a garlic press
~8 oz. lobster meat
zest from 1 lemon
2 Tbsp. finely minced fennel (fronds and/or stalks)
1/4 c. ricotta cheese
sea salt
white pepper
Filling Procedure
Pick through the lobster meat and pull out the nicest, reddest chunks to use for garnish and set them aside.
Then chop the rest of the meat very finely, chunks are the enemy of ravioli filling, so you're going for something like coarse sausage consistency.
Heat a saute pan big enough to hold all of your ravioli over medium heat. Add butter and olive oil until melted. Add shallots and cook for 2 minutes. Mix in garlic, then add lobster, lemon zest, and fennel.
Cook until heated through and add ricotta cheese, mixing until evenly distributed.
Taste and adjust seasoning with salt and pepper. Take off the heat and allow to cool.
Pasta Dough Ingredients
 |
| Pretty claw and leg meat set aside for garnish |
Then chop the rest of the meat very finely, chunks are the enemy of ravioli filling, so you're going for something like coarse sausage consistency.
 |
| Mincing the remaining lobster meat |
 |
| Lemon zest, garlic, minced shallot & chopped fennel fronds |
Heat a saute pan big enough to hold all of your ravioli over medium heat. Add butter and olive oil until melted. Add shallots and cook for 2 minutes. Mix in garlic, then add lobster, lemon zest, and fennel.
Cook until heated through and add ricotta cheese, mixing until evenly distributed.
 |
| Ricotta added & ready to be stirred in |
Taste and adjust seasoning with salt and pepper. Take off the heat and allow to cool.
 |
| A damp paper towel draped over the filling keeps it from getting crusty while it sits |
Next, make the pasta dough and assemble ravioli, but before you start, set a BIG pot of water on to boil and add a bunch of sea salt so it tastes oceany.
Pasta Dough Ingredients
2 c. all purpose flour
1 tsp. salt
3 eggs
1 egg + 1 Tbsp. water mixed together to form an egg wash
1 tsp. salt
3 eggs
1 egg + 1 Tbsp. water mixed together to form an egg wash
Pasta Procedure
Directions if you’re using a stand mixer
Put eggs, salt & flour in the bowl of your stand mixer in that order. Mix with paddle attachment on low until combined, increase speed to medium until the dough comes together and looks smooth and uniform throughout. It should not be dry nor sticky.
Directions by hand
Pile flour on a smooth board or countertop and create an indentation, or well, in the top of the mound. Crack the eggs into the well and sprinkle salt on top. Using a fork, beat the eggs, breaking up the yolks into the whites, while trying not to disturb the flour walls of the well.
Gradually start incorporating the flour into the eggs by increasing the boundary of the well with your fork as you beat- the circle where you’re beating with the fork becoming bigger and bigger across. Try not to dig the well too deep though, you want to keep everything contained in the well as it gets thicker and thicker.
Eventually (it doesn’t take long) you’ll have incorporated most of the flour and have something more doughy than liquid in the center of your well. This is when I switch to using my hands and knead in the rest of the flour. The dough should be smooth and not dry or sticky.
Rolling the dough into sheets:
Next your pasta dough will go through the final kneading in the pasta machine. Form the dough into an oblong rectangle an inch or two narrower than your pasta machine. Pass the dough through the widest setting on your machine, fold it back on itself and pass it through again. My dough was a little too wet and was coming out all raggedy still after 6 passes, so I dusted both sides lightly with flour, passed it through again and it came out beautifully.
When it looks like a sheet of pasta, start cranking down the opening, one level at a time, until it gets too long to handle, and cut it into pieces. The pieces you’re not working with can be stored under a damp paper towel until you need them. Ravioli needs to be as thin as possible so that when it doubles over onto itself at the seams, it’s not too doughy- on my machine that means level 6.
Assembling the ravioli:
Directions by hand
Pile flour on a smooth board or countertop and create an indentation, or well, in the top of the mound. Crack the eggs into the well and sprinkle salt on top. Using a fork, beat the eggs, breaking up the yolks into the whites, while trying not to disturb the flour walls of the well.
 |
| Scrambling the egg without disturbing the flour |
Gradually start incorporating the flour into the eggs by increasing the boundary of the well with your fork as you beat- the circle where you’re beating with the fork becoming bigger and bigger across. Try not to dig the well too deep though, you want to keep everything contained in the well as it gets thicker and thicker.
 |
| Progress incorporating flour into the egg, notice how the well got wider and shallower |
Eventually (it doesn’t take long) you’ll have incorporated most of the flour and have something more doughy than liquid in the center of your well. This is when I switch to using my hands and knead in the rest of the flour. The dough should be smooth and not dry or sticky.
Rolling the dough into sheets:
Next your pasta dough will go through the final kneading in the pasta machine. Form the dough into an oblong rectangle an inch or two narrower than your pasta machine. Pass the dough through the widest setting on your machine, fold it back on itself and pass it through again. My dough was a little too wet and was coming out all raggedy still after 6 passes, so I dusted both sides lightly with flour, passed it through again and it came out beautifully.
When it looks like a sheet of pasta, start cranking down the opening, one level at a time, until it gets too long to handle, and cut it into pieces. The pieces you’re not working with can be stored under a damp paper towel until you need them. Ravioli needs to be as thin as possible so that when it doubles over onto itself at the seams, it’s not too doughy- on my machine that means level 6.
Assembling the ravioli:
Once your dough is all rolled out, cut it into manageable sheets and lay them out on a floured board (otherwise your ravioli will stick). Mound teaspoons of filling down one side of the dough rectangle, about an inch apart, being careful not to use too much- it’s tempting to overfill.


Brush a little egg wash between each mound and down the long side of the sheet of pasta- remember egg wash doesn’t stick well to egg wash, it sticks to the pasta, so be aware of where you’re brushing that stuff. Fold over the other half of the pasta sheet and gently press the dough together between the filling, trying not to trap any air in there (it can cause the ravioli to burst when you boil them). Use a sharp knife or a fancy pants ravioli cutter to trim the edges and cut into individual ravioli. Repeat until you’re out of filling or pasta or decide you have enough and are over it.
Next make the sauce.
Sauce Ingredients


Brush a little egg wash between each mound and down the long side of the sheet of pasta- remember egg wash doesn’t stick well to egg wash, it sticks to the pasta, so be aware of where you’re brushing that stuff. Fold over the other half of the pasta sheet and gently press the dough together between the filling, trying not to trap any air in there (it can cause the ravioli to burst when you boil them). Use a sharp knife or a fancy pants ravioli cutter to trim the edges and cut into individual ravioli. Repeat until you’re out of filling or pasta or decide you have enough and are over it.
 |
| Ravioli waiting to go in the jacuzzi |
Next make the sauce.
Sauce Ingredients
6 Tbsp. butter
1 Tbsp. finely minced shallots
4 Tbsp. flour
3/4 c. champagne
juice from 1 lemon
3/4 c. cream
salt
white pepper
Sauce Procedure
1 Tbsp. finely minced shallots
4 Tbsp. flour
3/4 c. champagne
juice from 1 lemon
3/4 c. cream
salt
white pepper
Sauce Procedure
Melt butter over medium heat, add shallots and cook for a minute. Add flour and cook 3 or 4 minutes until the raw flour taste has been mostly cooked out. Add the champagne and lemon juice, raise the heat to medium-high, and cook another couple of minutes. Stir in the cream, bring up to almost a boil and taste for seasonings. Add salt and pepper if needed and reduce heat to low.
Finish the dish.
Add the ravioli to rapidly boiling water and cover. Cook for 3 minutes. Fish out the ravioli with a spider or slotted spoon and add to the pan of sauce.
Toss to coat and serve in a warmed bowl, garnished with red lobster chunks and chopped fennel fronds.
 |
| The finished champagne cream sauce, being kept warm on the stove |
Finish the dish.
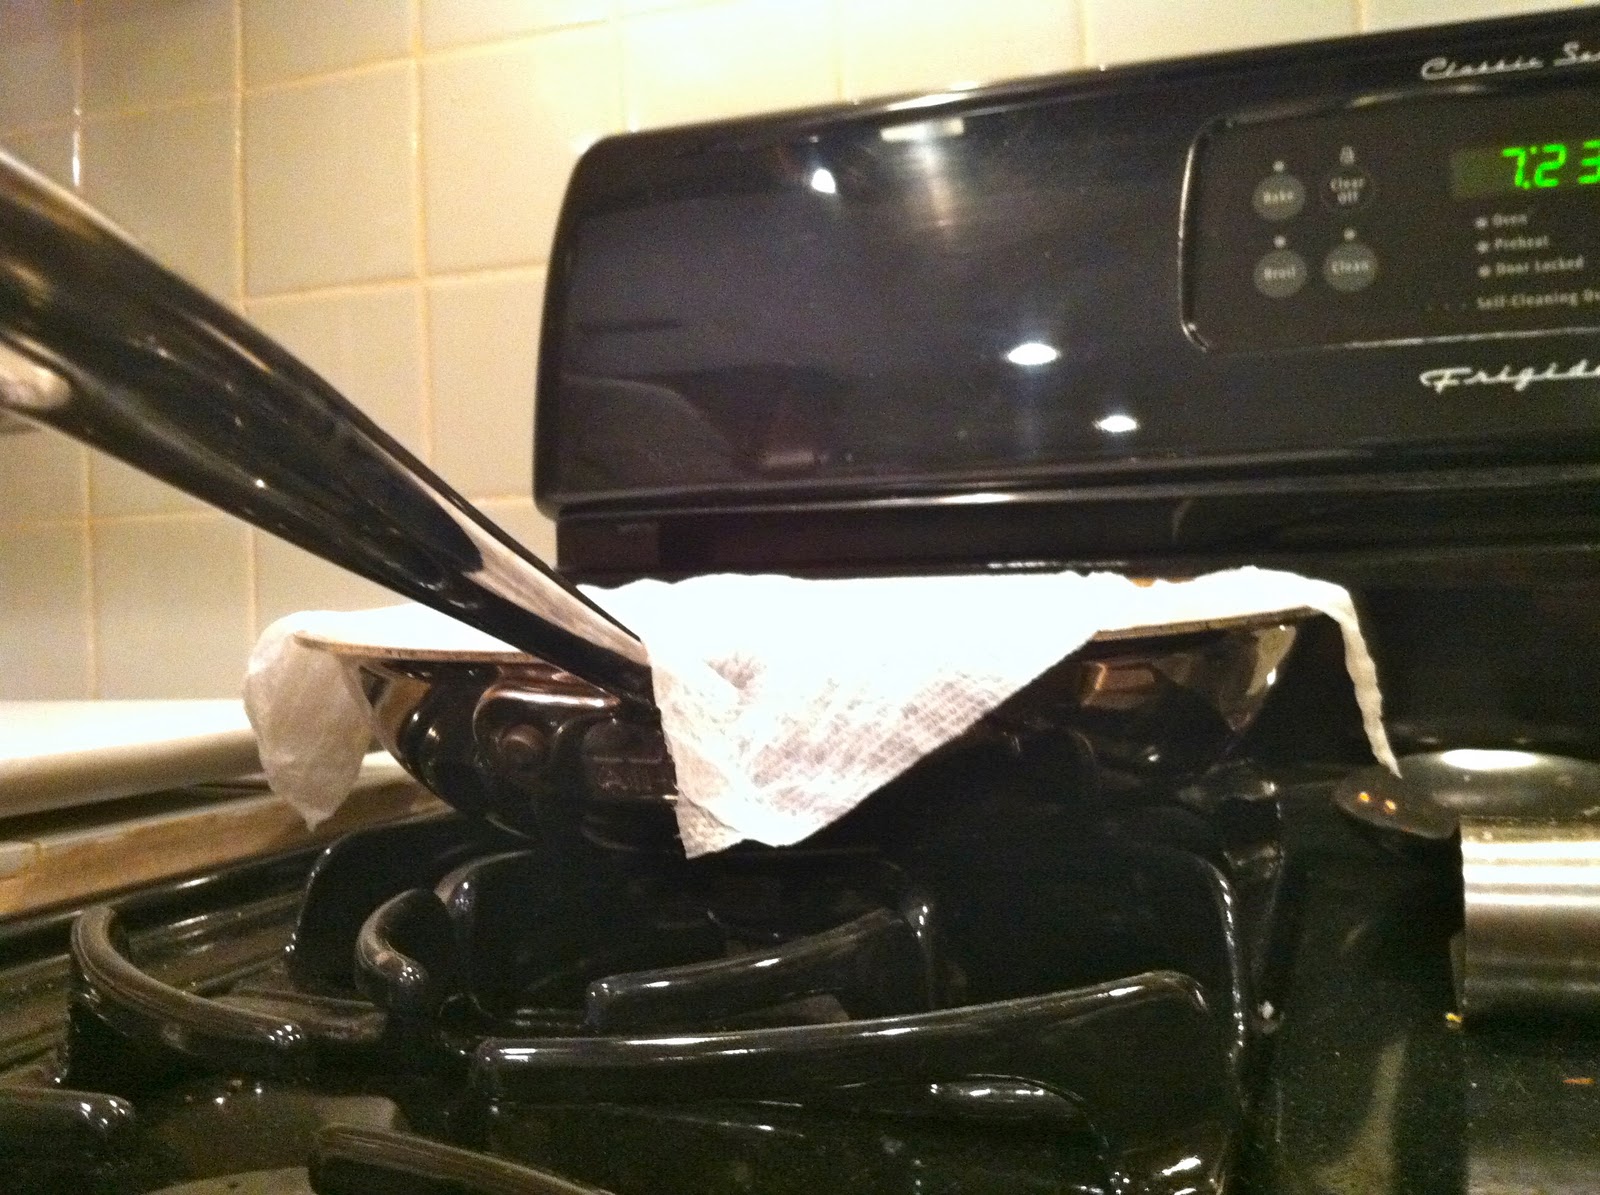
 |
| Lifting the lid for a couple seconds will deflate any ravioli threatening to pop as they cook |
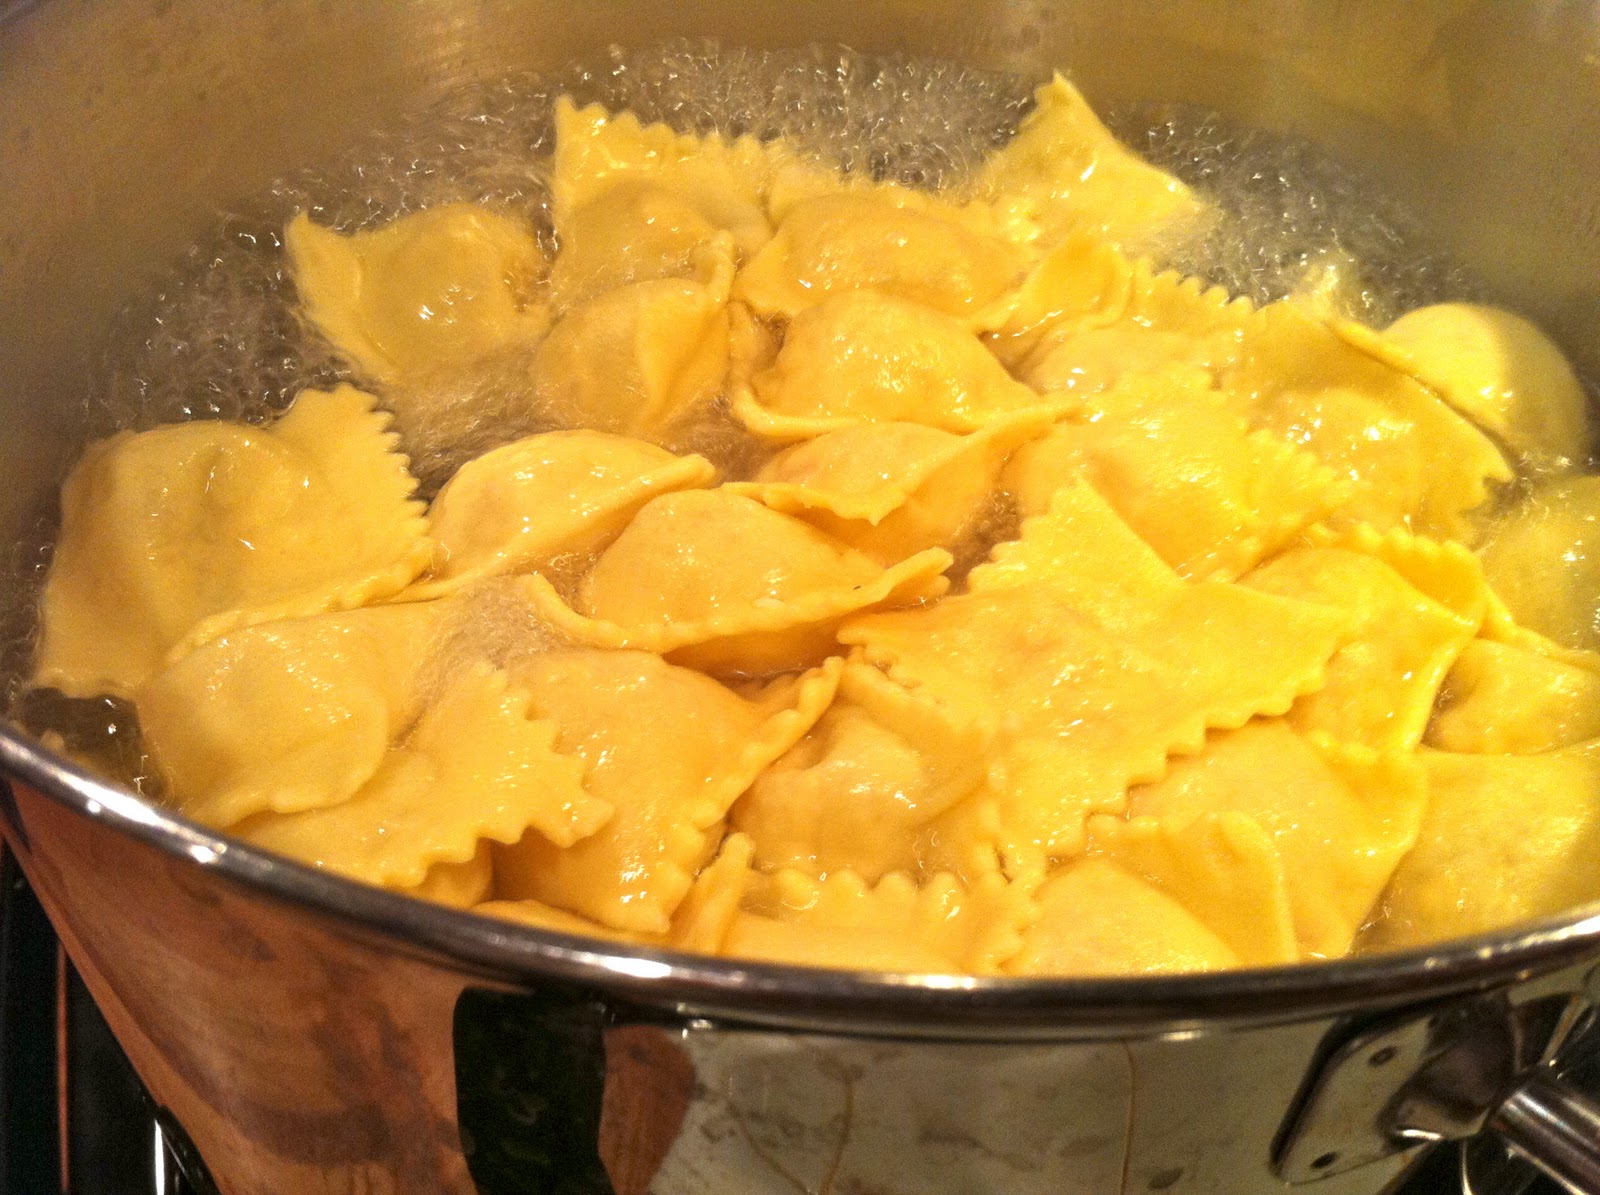
Add the ravioli to rapidly boiling water and cover. Cook for 3 minutes. Fish out the ravioli with a spider or slotted spoon and add to the pan of sauce.
 |
| Out of the water, into the sauce |
Toss to coat and serve in a warmed bowl, garnished with red lobster chunks and chopped fennel fronds.
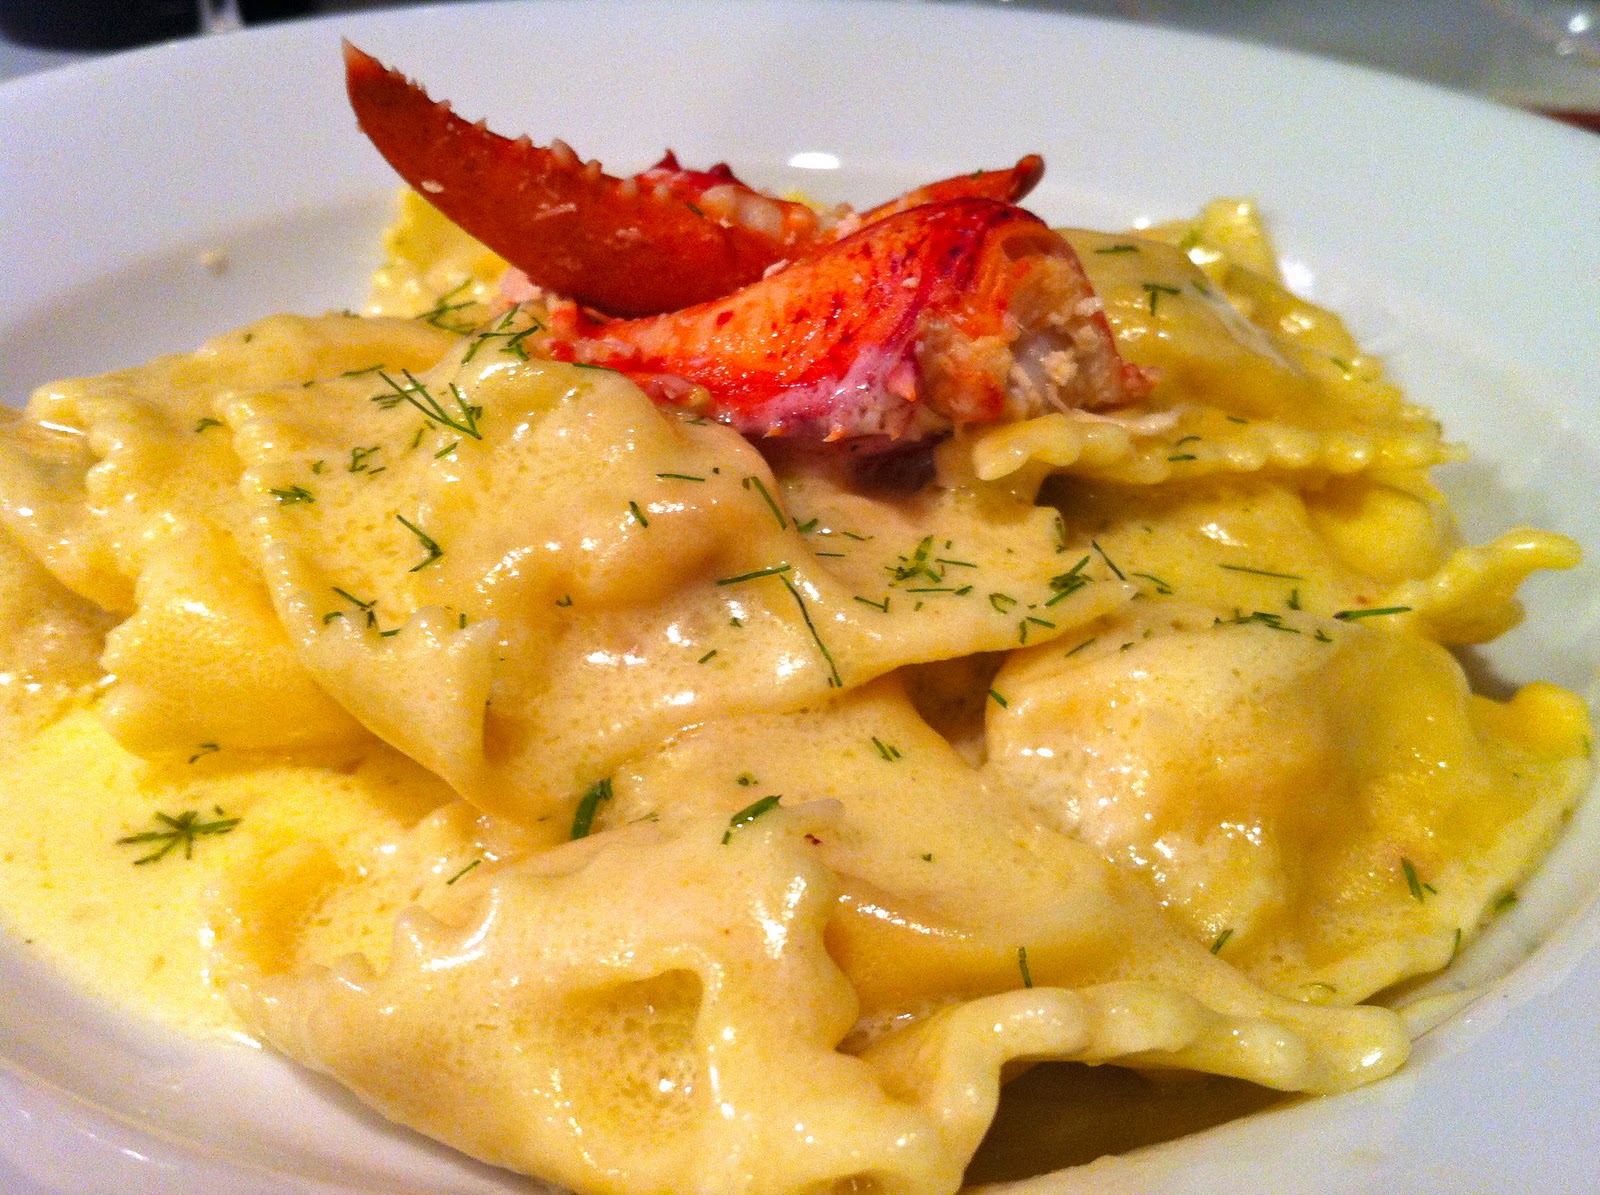 |
| Lobster Ravioli with Champagne Cream Sauce |
No comments:
Post a Comment